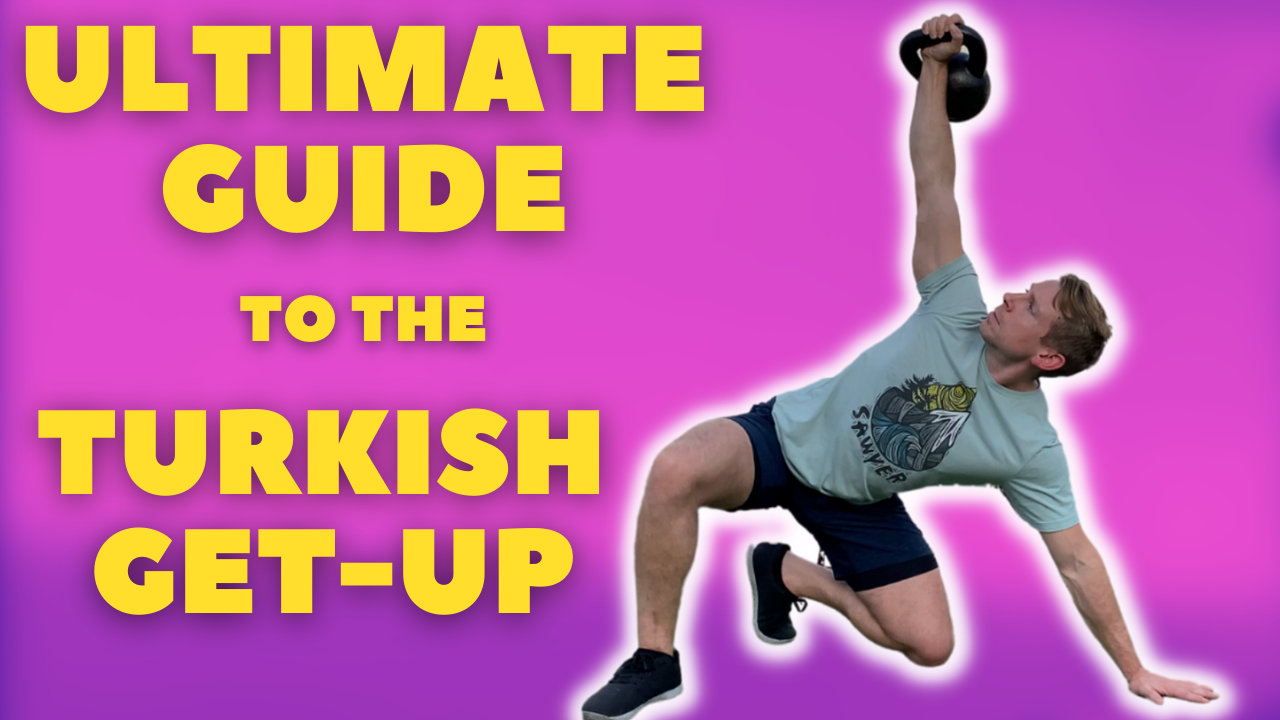

Buckle up y’all, because today we’re breaking down the mighty Turkish Get-Up – one of the best kettlebell exercises you can do for your core strength, shoulder stability, and overall athleticism.
The Turkish Get-up is often referred to as “yoga with weight.” The yoga combo of graceful movement between balanced static postures is the same approach we take to the get-up.
The full get-up sequence is a series of about 12 moves that take your body through various positions – from lying on the ground, to standing up, and back down again – all while stabilizing a weight overhead.
The get-up is one of those desert island exercises (one lift that checks a lot of boxes) because it builds strength, mobility, and control through practically every joint and muscle group in the body.
The get-up is notoriously tricky to learn, at least it was for me. Even after months of training, I still made little mistakes and got confused on some of the steps.
It wasn’t until my first kettlebell workshop that I finally got it down, and that was only because I pestered one of the lead instructors to work with me 1 on 1 during the lunch break.
I’m going to share some of the tips and tricks she taught me to help you shorten your learning curve so you can start enjoying all the benefits the get-up has to offer.
Master “Naked” Get-ups First!
Before we dive into the steps and techniques, first a disclaimer:
Even though this lift is traditionally performed with a kettlebell, you’ll need to learn the entire Turkish Get-up sequence “naked” – bodyweight only. Once you’re comfortable with all the steps, perform the get-up with a shoe or yoga block balanced atop of your fist.

There are three main reasons for this:
1) This is a complex lift and it’s easy to get pretzeled up. You don’t want to be worried about balancing a hunk of iron over your head while simultaneously figuring out what to do with the rest of your body.
Get the steps locked in to your nervous system until they become natural. This will free up the effort and focus you’ll need to handle weight in the top arm.
2) Balancing a shoe or block on your fist will teach you about efficiency and proper alignment. You’ll be forced to slow down and keep a perfectly vertical arm which is a key part of get-up technique.
If your arm wobbles and moves off that vertical axis, the shoe will fall and you’ll be no worse for the wear. But when you’re using weight, any deviation from that vertical alignment can put your shoulder at risk.
3) The unweighted or “naked” get-up is a valuable exercise in its own right.
Sure, it’s cool to show off your strength with a heavy kettlebell, but the real value of the get-up is in how you build coordination through the body in order to get your head back over your center of gravity in a fall recovery scenario.
The TGU Set-up
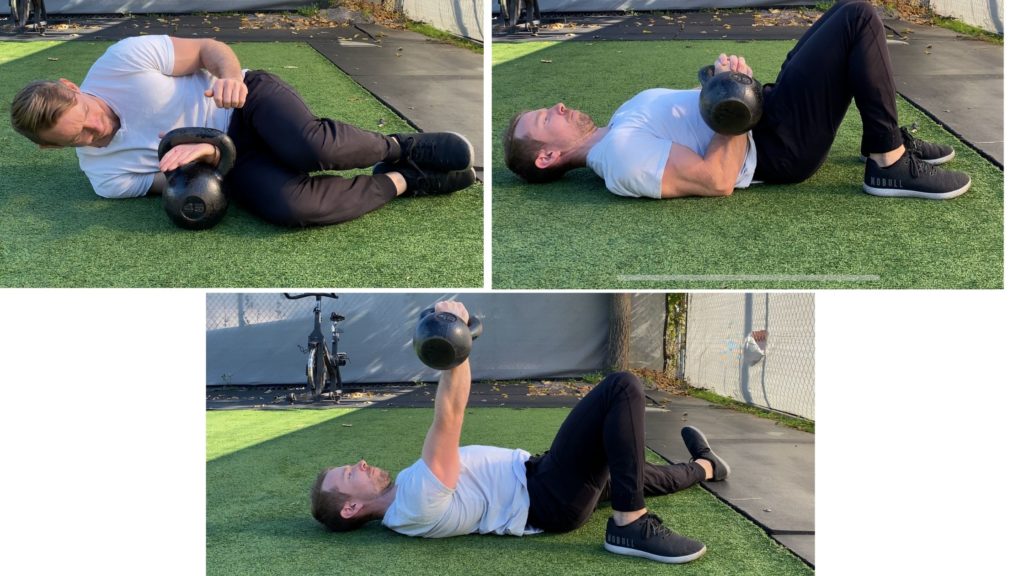
Lie down next to your kettlebell such that it’s next to the side you wish to load up. The way we get the kettlebell into position here is important, so don’t rush.
Tuck the knees into the chest and lie on your side facing the kettlebell – the so-called fetal position. Spear your down-side hand through the handle, adopting your diagonal press grip. Place your other hand on top to double up the grip.
Reverse the roll to your back while leveraging the kettlebell into the floor press position – lat and tricep tight together and elbow resting on the floor. Keeping the knees tucked in with the supporting top hand grip helps to pry the kettlebell off the ground while minimizing stress to the elbow and shoulder.
With your feet planted, use both hands to press the kettlebell into a straight-arm lockout. Re-engage the lat and pec to pull the arm pit down towards the hip. Keep the shoulders down and away from the ears throughout the lift.
Once you’re secure in the lockout, let go with the top hand and rest the arm palm-up at about a 45-degree angle from the body. Adopt the same angle with the same-side leg.
This is the first place people get stuck by extending the wrong leg!
An easy way to check yourself here is by wiggling your free hand and foot which should always be on the same side. So think – “free side” and “planted side.”
The elbow should remain locked straight with strong triceps through the entire lift. Likewise, the wrist should be kept straight or slightly goosenecked in.
A bend in either the elbow or wrist creates dangerous instability and stress on the joints and tendons!
For the next few steps, keep your eyes on the kettlebell.
Roll To Elbow
Simultaneously dig in and pull with the planted elbow, push with the opposite foot, and cut an angle across, leading with the chest.
Don’t flex at your neck – this is not a sit-up!
Keep a broad chest and maintain that lat engagement in both the top and bottom sides to support the shoulders.
Bonus tip: To really get the feeling of pulling with the planted arm, try pulling against a heavy tipped-over kettlebell handle.
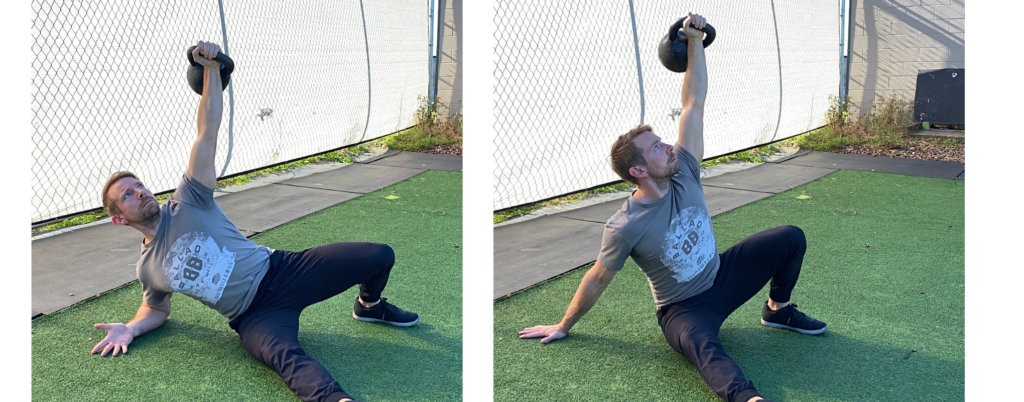
Next, we’re going to create more space between the head and the ground by extending the down-side elbow into a tall seated position.
As you straighten out the elbow, externally rotate the arm so the fingers point backwards.
From here, you can take time to move the planted hand and foot around to find your most secure and comfortable position for the bridge.
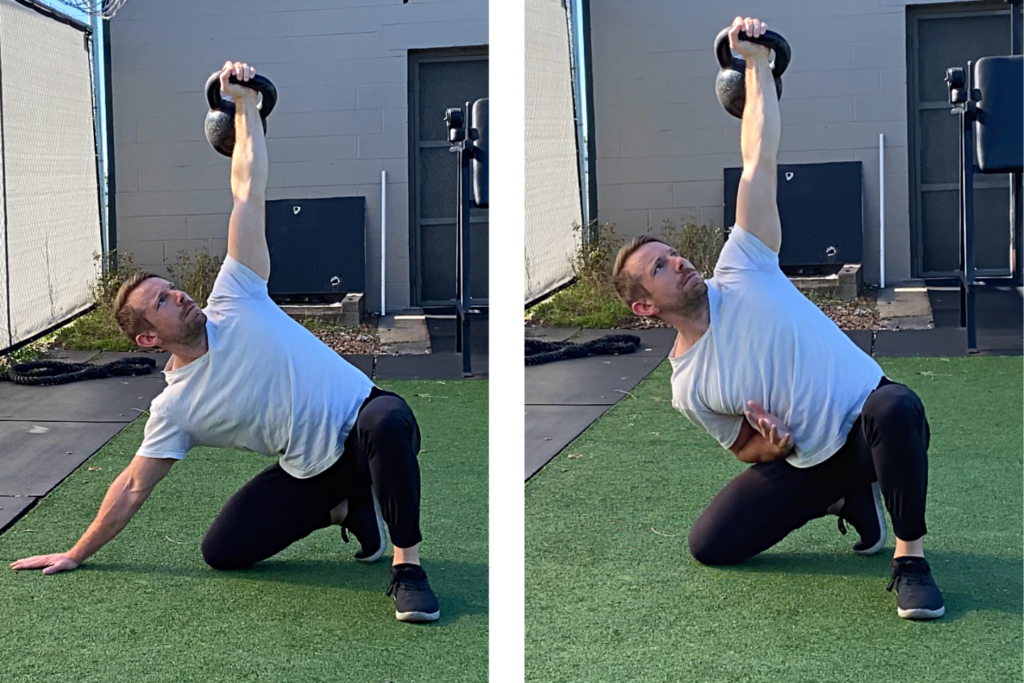
Bridge
The 1-arm, 1-leg bridge mirrors the angle of the initial roll up – we’re lifting the hips at a diagonal, not square and straight up.
Root hard through the planted hand and foot and squeeze the glutes.
The outer blade edge of the elongated foot can give some support, but keep the leg relatively relaxed.
Sweep to Low Base
The leg sweep is a big transitional move and where many lifters get pretzeled up.
As always, take the time to master this step without weight first!
From the bridge position, bend the extended leg so that the knee points towards the planted hand.
Pull that knee back until it’s directly under the hip.
When you settle, the bottom hand, knee, and foot should be in alignment.

The most common error is prematurely rotating the swept leg into a lunge position, which twists the back and compromises your base stability.
Take your time to find the perfect alignment in this 4-point base.
It should also feel easy to hold this position and to rock your hips toward the down side heel, which sets us up for the next transition.
* If the high bridge sweep isn’t appropriate for your mobility, you can simply fold the extended leg and sweep the ground, ending in the same base position.
Hip Hinge to Lunge Base
From the 4-point base, hinge the hip back toward the heel. This subtle move shifts the weight onto the hips and away from the planted hand.
You should be able to easily pull your hand off the floor and maintain your balance and control of the kettlebell.
From this deep hinge position, extend the hips and bring your torso upright.
A common error here is merely side bending yourself up without loading the hip hinge.
Before the final lunge up, you must first close the hip angle.
I suggest stepping the front foot forward into alignment as this gives you easy control over your foot placement.
You could also simply “windshield wipe” the rear leg into alignment but this method doesn’t offer as much opportunity to make micro adjustments in your lunge set up. Plus, twisting the knee like that isn’t fun on hard surfaces.
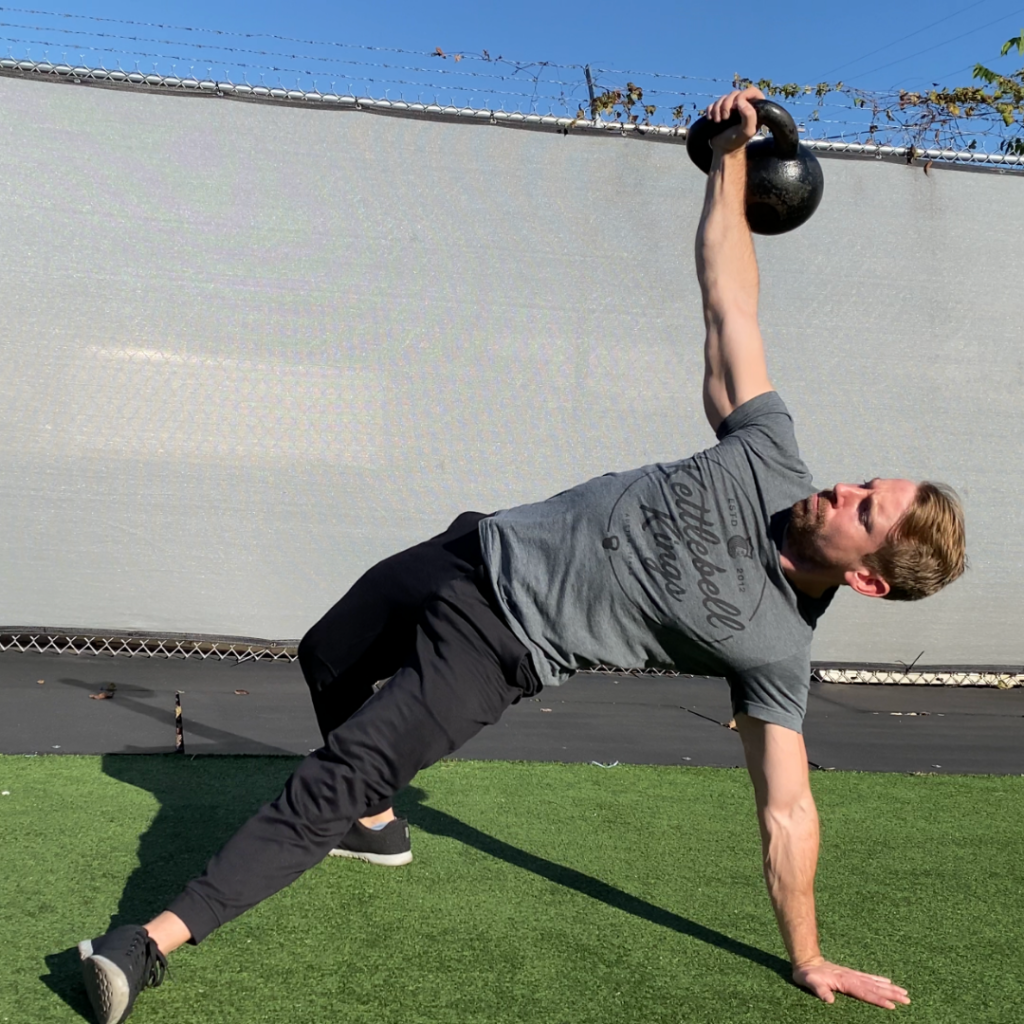
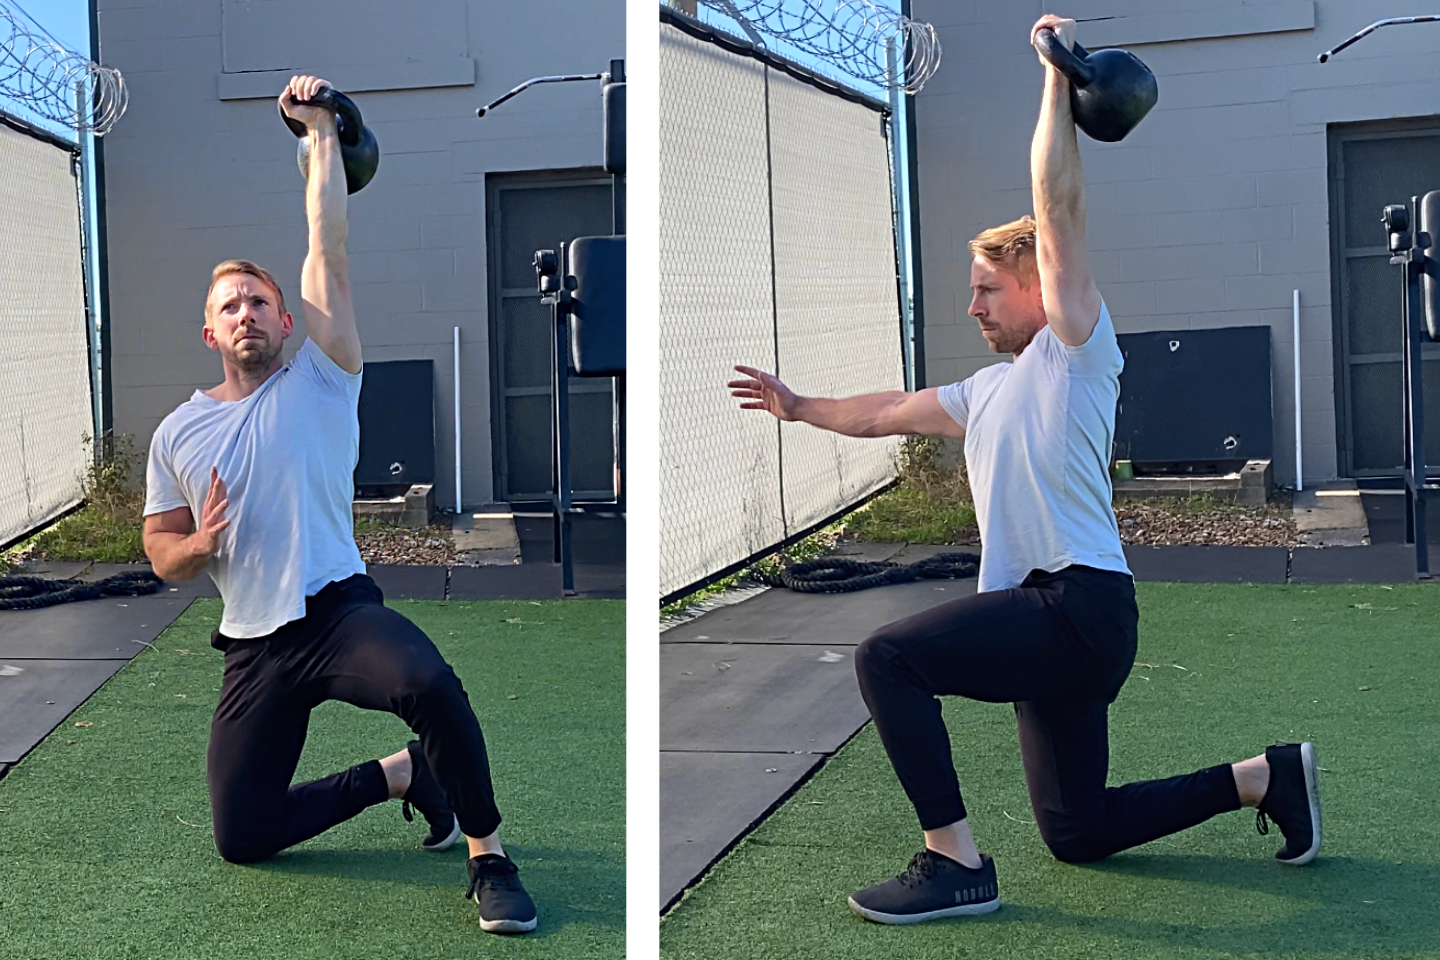
Lunge Up
At this point, you’re in the bottom position of a lunge.
The rear toes are tucked under, the bottom knee is directly under the hip, the front knee is at 90 degrees, and the loaded arm is in vertical alignment with the torso.
Now that you’re in a solid base of support, you no longer need to keep your eyes on the kettlebell.
Bring your gaze forward, give the handle an extra squeeze, and drive off the back foot into a standing lockout.
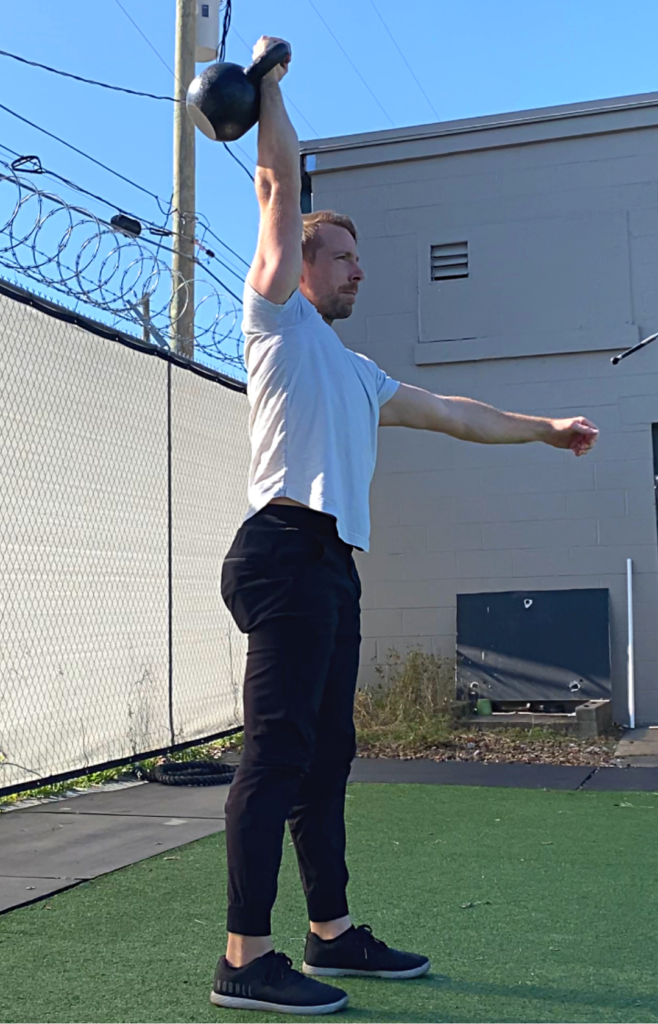
Congratulations – you’ve done a picture perfect get-up!
Take a breath or two but don’t lose your focus, because we’ve got to get all the way back down and we’re going to be just as precise with our steps.
Reverse Lunge
Begin with a reverse lunge of the unloaded side leg.
Plant the knee softly and make any micro-adjustments you need.
Bonus tip: It’s easy to get your lunge legs mixed up on the way down. A simple way to get it right every time is to cue yourself with a leg tap.
Simply tap your thigh with your free down-side hand. The leg you tap will always be one you step back with.
Open Hip to Low Base
Now that you’re at the base of the lunge, open the hip by sweeping the front leg out to the side.
Hinge the hip towards the downside heel as you bring your gaze back up to the kettlebell. That hip hinge lowers your torso which makes it easy to find the ground again with your free hand.
Slide your hand out as you move the torso laterally back into the 4-point base position.
Pause here and make sure everything is squared up as before – the bottom foot, knee and hand are in a straight line, the hip is at 90 degrees, and the eyes are back on the kettlebell.
Sweep to Sit
We’re not going to perform a bridge on the way down.
Press hard through the foot and hand and simply sweep the back leg out and sit.
Wave Down
We’re almost there, but don’t rush through the final steps!
Fold the elbow and turn the torso back to that diagonal.
Return to the floor in the same wave-like fashion you came up.
Don’t crash!
Set Down
Bring the extended leg back in and plant both feet.
Use two hands to bring the kettlebell down to your side.
Tuck the knees and roll over to your side and park the kettlebell.
Whew!
There you have it – the TGU laid out in it’s beautiful entirety.
Take the time to master this lift and you’ll be rewarded with uncommon physical prowess.
Want to take your TGU practice even deeper? Check out these articles:
TGU Tips from the Pros (Pt. 1)
TGU Tips from the Pros (Pt. 2)
Want a step-by-step guide to lifting kettlebells like a pro?
My new training manual and program is available now – Kettlebell Foundations cuts through the noise to deliver a clear process for getting everything you want out of your kettlebell training.
You’ll develop useful lifting skills and get surprisingly stronger along the way.
Just click here.