Back in June, I hosted a hybrid training workshop called the “Strength Unlimited” seminar. The premise being that the info covered revealed the principles to accomplish any strength goal.
The first half of the seminar was a crash course in the Original Strength System by PJ Olsen. I’ve used the reflexive strength approach to great success in my own training and the programs I write for my students. Having this material covered in depth was a no-brainer for the goals we wanted with the event.
What I’m going to share here is a recap of my portion of the seminar as well as a deep-dive into some of the intricacies that I couldn’t elaborate on due to our time constraints.
Part 1 – The Core
Increased core strength will translate into better performance in nearly every physical activity.
But what do we mean by core strength? Without going too far down the rabbit hole, we are really concerned with one’s ability to brace effectively for the task at hand – efficiently transferring energy to the limbs and providing stability to the trunk.
Hardstyle Plank
The intention behind a hardstyle plank is to maximally engage the entire body from the shoulders down. By understanding what 100% muscular engagement feels like (allowing for zero movement), you know the “spectrum of stiffness” your body is capable of and can dial up or down accordingly.
Side Plank
Gaps in lateral chain strength are often sources of instability that affect everything from hip mobility to shoulder mechanics. A side plank held with proper alignment is a simple but effective way to supercharge your core bracing skills.
Pro tips: While holding a side plank, poke the lower oblique with two fingers – breath into that spot. Repeat this tactile drill on the area just below the bellybutton and on the top oblique. By breathing into each of these areas against the pressure of your fingers, you will further strengthen your bracing abilities.
Hollow Body Hold
This gymnastics staple takes the plank to another level. By adding the leverage of outstretched arms and legs, the hollow position “loads” the abs in a manner that is specifically conducive for strong pull-ups and hanging leg raises.
McGill Curl Up
The curl up is a great example of a core strengthening move in the context of back rehab/prehab. By minimizing hip flexor involvement and keeping the lumbar spine neutral and supported, the curl up trains the abs around a safe, strong spine position.
What you’ll notice here is all these core moves are isometric. That’s because the goal is to learn and practice bracing – fixing the torso position and keeping it there! Obviously, flexion-based exercises like hanging leg raises have their place, but to get stronger across the board, a stiff, unyielding core is step #1.
Here is some seminar video from the core sequence. Apologies for the audio!
Part 2 – The Squat
Whether you want more muscle, hip flexibility or just want that next plate for your back squat, these ideas are sure to help get you there!
Total Torso Breathing
Original Strength covered the tenants of diaphragmatic breathing and part 1 above covered core bracing strategies. Now we are going to combine those techniques in the context of heavy lifting.
Most deep breathing cues instruct you to “breathe into the belly.” This is good. But for a heavy back squat, it is but 25% of the equation. Take full advantage of the intention of the breath by breathing into the low back, chest, and upper back as well!
“Breathing into” an area is a bit hard to describe, but it’s really about mentally checking-in with parts of your body – using an inhalation as your guide. Becuase an inhalation is generally creating space and pressure, you can transfer that energy to create better stability.
Start by using tactile cueing: Place your hand on your lower abdomen. Breathe in and push your hand out. Repeat with your hand on your low back, then chest, then upper back. As you can see, this is simply a continuation of the breathing drill we did in side plank!
Screw the Feet / Spread the Pockets
These are two powerful ideas that can unlock tons of strength and mobility.
“Screw the feet into the floor” is an easy way to start generating tension through the hip external rotators and is a great cue to keep in mind before focusing on pushing the knees out.
Speaking of which, pushing the knees out in the squat is a great idea for most people, but (much like breathing deeply) only gets half the point across.
Get the knees out not just by pointing the caps away, but from the hips. In other words, spread your side pockets!
Drive The Big Toe
When squatting, definitely keep your weight centered in the foot tripod fashion – big toe, little toe, heel. As you’re coming up from the hole, drive your big toe down hard! Simple.
Asymmetrical Stance?
Your hips may not be shaped exactly like you’ve seen in the anatomy books. Hip sockets can be deep, shallow, and slightly pointed in different directions. For this reason alone, it’s inappropriate to suggest a single, symmetrical squat stance for everyone.
Experiment with the following stances with a bodyweight or goblet squat and not how each feels:
Feet more narrow or wider. Feet straighter or turned out. One foot more angled out than the other. One foot planted slightly behind/in front of the other.
Part 3 – The Bench
My guess is sub-optimal bench press technique is responsible for the vast majority of gym injuries. Even if you have no desire to bench, the principles herein will still be valuable for your upper body strength development and shoulder health.
A Total-Body Lift: Rootedness, Tension, Arch, Breath
Here I basically combine all of the breathing and tension concepts with the arched position.
It’s way too much to write out here, but I made a free webinar video that goes into detail about these ideas and more. You can check it out by clicking the title below:

The Lateral Arch
Most of us are familiar with the concept and importance of arching the back in the bench press. But there is another arch to keep in mind in order to set the shoulders in a safe position – the lateral arch. This is the arch across the chest, from shoulder to shoulder. Instead of just thinking about trying to keep the scapulas down & back, imagine strengthening the arch that is created across the upper back and chest. This might unlock a whole new level of lat/upper back engagement!
Bend, Rip, and Drive
To coax out every bit of pressing strength you have, don’t neglect the grip!
Cue 1 – “Bend” the bar. This will help strengthen the lateral arch and turn on the pecs.
Cue 2 – “Rip” the bar apart. This will generally help activate the lats and triceps.
Cue 3 – Drive the bar hard and fast. Pretty much self-explanatory. Never slouch on press speed!
Just like with the squat cues, practice these one at a time and see what helps you the most.
Random but important points:
- Do lots of pulling to balance the pressing – 1-Arm Rows, Bodyweight Rows, etc.
- Do lots of push-up variations that allow for more scapular movement
- Do lots of T-spine extension and rotation drills
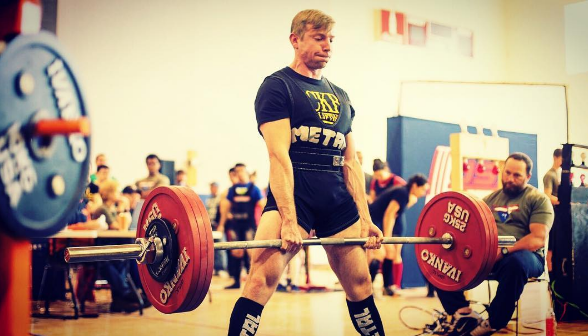
Part 4 – The Deadlift
Perhaps the king of all strength moves. Having a strong hip hinge pattern is vital for total-body strength and back health.
Stance
Conventional? Sumo? Jefferson? Asymmetrical foot placement?
Much like the squat, there is no one best way to deadlift. I typically coach by feel and speed. Does it feel good? Does it feel fast and smooth?
I’m also a fan of biofeedback testing different deadlift styles.
The gist is every movement will have an effect on your nervous system that manifests in passive range of motion. Do a rep. More ROM = good. Less ROM = bad.
The Wedge
Getting your hips into an optimal position and generating some tension through the whole body before the lift starts in earnest is what I refer to as “the wedge.”
This will ensure there is no wasted movement or loss of stability at the start of the pull, where you are typically most vulnerable to injury.
Part 5 – Loaded Carries
I’m a big fan of “in-between” strength exercises – those moves that don’t fit nicely into any one specific plane of motion yet seem to help everything. Loaded carries are the king of this category.
A loaded carry is just walking with extra resistance. Simple! But rarely easy.
The most common loaded carry is the mighty Farmers Walk – pick up a couple weights and walk around.
Here is a powerful tweak to the Farmers Walk:
We ended the seminar with loaded carries because even if one forgets or disregards all the preceding info, many gains are sure to be had just by prioritizing these!
Thanks again to everyone who came!
If you’d like to stay up to date on future events, be sure to sign up for my strength newsletter here and get a free powerlifting video course.