Every skill – from music to math to sports – contains within it a set of fundamental ideas that demand consistent practice in order to attain mastery. We call those ideas “the basics.”
Skip the basics and you’re walking on shaky ground. Doomed to the amateur level.
When it comes to kettlebell workouts, many lifters jump right into fancy exercises with no regard for developing the basics… and it shows.
I blame fitness gurus and Instagram trainers but that’s another story.
Even popular books and articles written by trustworthy authors are guilty of glossing over many of the foundational skills and drills that would shorten a beginner’s learning curve.
Swings and get-ups are the most popular of the basic kettlebell exercises, but there are many beginner-friendly moves that build strength and specific kettlebell technique that need some attention first.
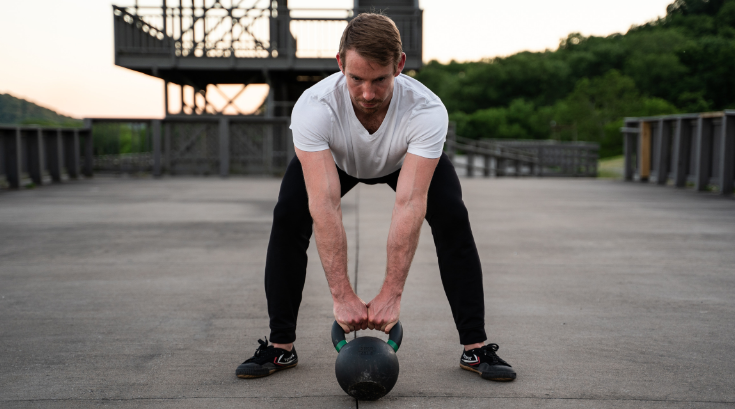
You want to get the most out of your kettlebell and be confident you’re using it correctly. Try these 5 simple exercises that are fun, easy to learn, and will set you up for future success with more advanced moves.
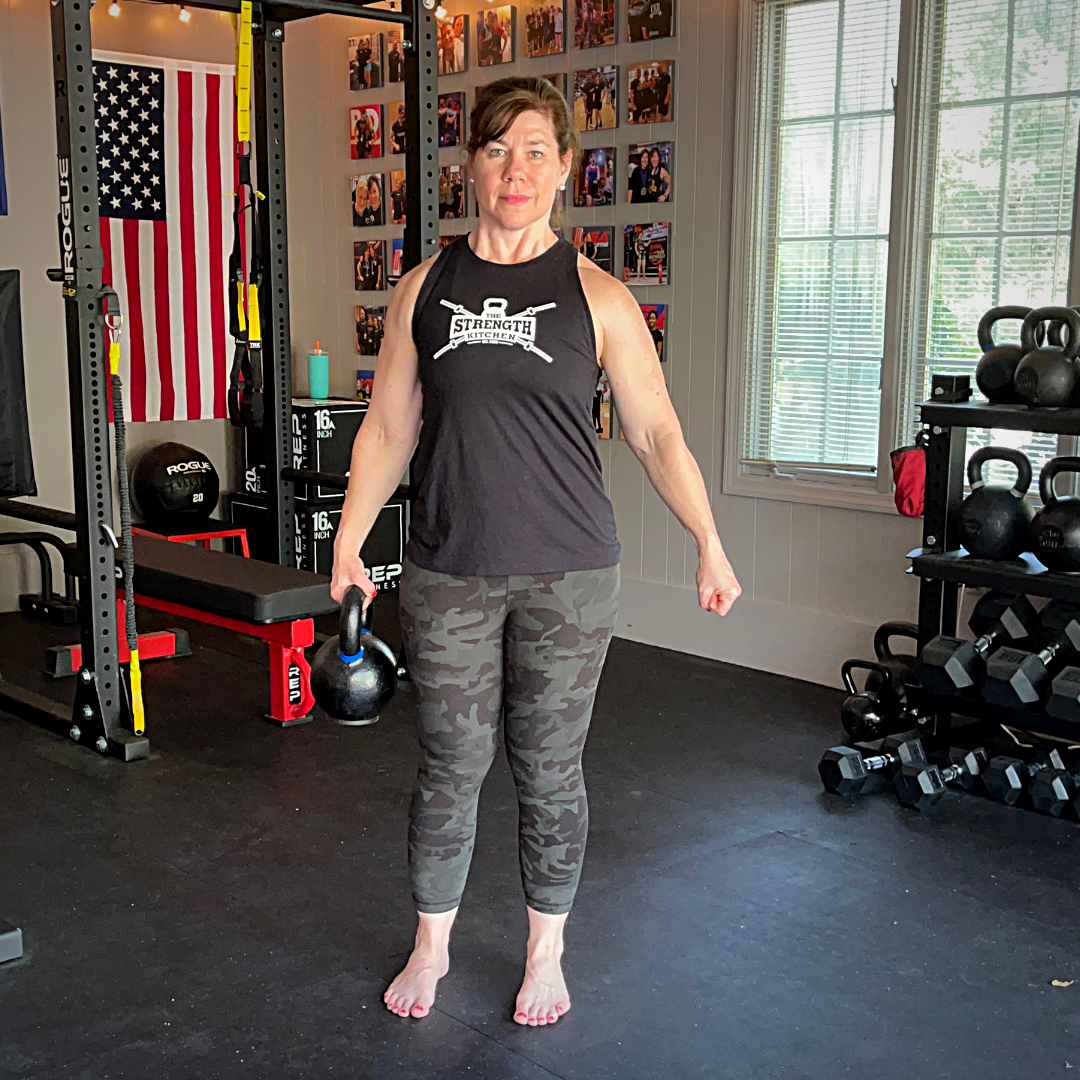
The Kettlebell Suitcase Carry
The first exercise might seem too simple… at first.
Just hold a kettlebell in one hand, by your side, and walk around or march in place.
But what are you actually accomplishing?
A few things.
First – you’re just getting used to the weight of the kettlebell. For new lifters, this is like a form of exposure therapy. You’re also practicing strong upright posture, breathing, core bracing, and grip strength… all while under load.
Think of the suitcase carry like a standing side plank. Because the weight is only on one side, you’ll build anti-rotation core stability and get the chance to feel out left/right imbalances in a low-risk movement.
The suitcase carry is a classic core and oblique builder and, with the right intention, can help you find your lats as well.
Standing upright, with mid-foot balance (with one or two kettlebells), is my new favorite way to begin teaching the swing. As a form of top-down learning, we get used to the top lockout first – how does it feel to stand tall and balanced as the body becomes fatigued, shaky, or otherwise distracted by a heavy weight in your hands?
Other benefits are obvious – the very first step in any workout is to pick the darn kettlebell up and move it to where you want it. Moving a weight from here to there is all we’re doing.
Putting your weights away is Gym Etiquette 101. Not only is it the right thing to do, it also gives you a bonus core workout.
So, this is where we start – pick up a kettlebell, keep a tall posture, and start walking.
Tips and variations – Walk VERY slow, drive the knees high, march in place (with one or both eyes closed), walk up stairs, keep the face/neck relaxed.
Goal – 1 minute carry each side. Men – 32kg / Women – 24kg.
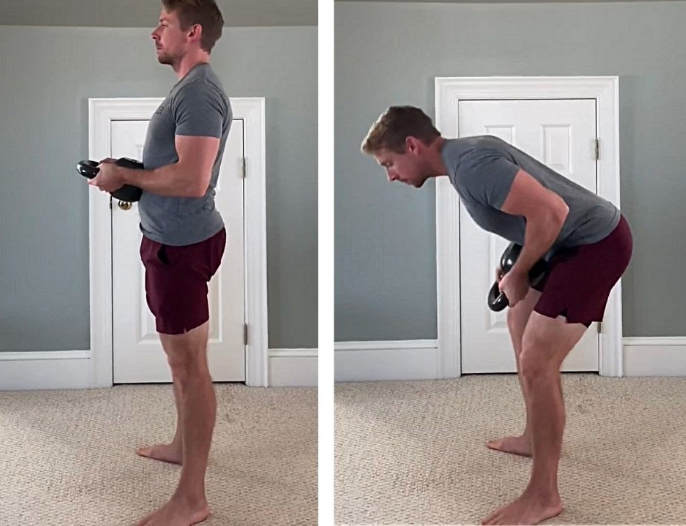
Belly Hinge
One of the toughest jobs a trainer has is teaching the hip hinge to a new client. Especially one with little-to-no athletic background, or who sits too much, or has suffered poor coaching in the past.
So, pretty much everybody.
Finding the hip hinge “sweet spot” (the right amount of hip and knee bend) unlocks the true power of the body and is why the kettlebell swing is such a great exercise – it’s all hip hinge power. Nail this hinge position, and everything becomes stronger and safer.
But how do we get there?
Jumping right into swings too often leads to a sore back, so let’s start with some foundational position work.
Coaches often give so many cues when teaching a new exercise, they overload clients with too much to think about. We can talk technique all day, but you need to feelthe movement, not just logically understand it.
For many, this hip hinge drill does the trick:
Grab a kettlebell by the horns, and push it into your belly, just above the navel. Hinge back with soft knees, feet turned slightly out. As your torso comes down towards horizontal, drive the elbows back (like a row), squeeze the shoulders down and back, and brace the abs against the bell. You’ll feel a good stretch in the hamstrings.
Because the bell is held close to your center, you don’t have to worry about the “path” of the weight. It goes where you go. Focus on core and back tightness and finish with a strong glute squeeze at the top.
This exercise is, basically, a kettlebell swing slowed down.
Use lighter weights (8-16 kg) to pattern the movement – you don’t want the arms struggling here.
Goal – 10 reps with a good hamstring stretch and glute engagement.
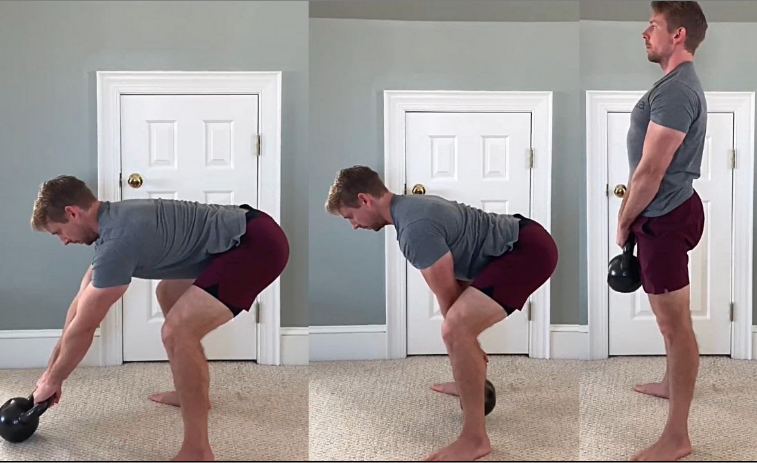
Drag Deadlift
The deadlift is a foundational exercise in anyone’s workout program. When it comes to kettlebell training, there is a special deadlift variation that is particularly useful.
The traditional deadlift moves a weight vertically – straight up and straight down… and that’s how we lift super heavy weight safely (the deadlift typically allows you to lift the most weight physically possible)…
But the swing is a horizontal pattern – the bell travels forward and back and thus, you need a slightly different intention for the swing compared to the deadlift.
The drag deadlift adds this touch of horizontal movement.
Set up an arm’s-length away from the kettlebell.
Using the lats and triceps, slowly drag the bell under your hips and stand up. This simultaneous “pull” with the lats and “push” with the triceps strengthens the hip hinge setup and will take your kettlebell swing power to the next level.
For bonus, you can lift and float the bell a few inches off the ground after the drag. This isometric hold really solidifies the swing/deadlift set-up.
Goal – 5 reps. Men – 32kg / Women – 24kg.
Power Clean + Squat
Now that we’ve got the hip hinge dialed in (yes, it’s that important) and your posterior chain fired up, let’s amp things up with a dynamic combo exercise.
You’re going to use that hip power to launch a kettlebell off the floor and catch it at chest height. This “ballistic” lift is paired with a slow “grind” lift – the goblet squat.
Start in the standard deadlift position – stand over the kettlebell and stretch back into the hamstrings. Lift faster than a typical deadlift, increasing speed as you approach lockout. Keeping the lats tight but grip semi-loose is key here.
As the legs and hips straighten out, transfer the momentum into the arms and whip the bell up. Bend the elbows to keep the kettlebell close to your torso and quickly move your grip from the top of the handle to the sides (the “horns”). Pause for a second to make sure your grip is secure and you’re engaged through the whole body.
From there, simply descend into a squat, holding the kettlebell out in front of the chest, until the elbows make contact with the inside of the knees. Pause for second or two and stand up.
The combo of fast, dynamic movement and slow, controlled lifting is a trademark of good kettlebell training and the secret to building strength and sculpting a lean physique at the same time.
Goal – 10 reps. Men – 24 kg / Women – 16 kg
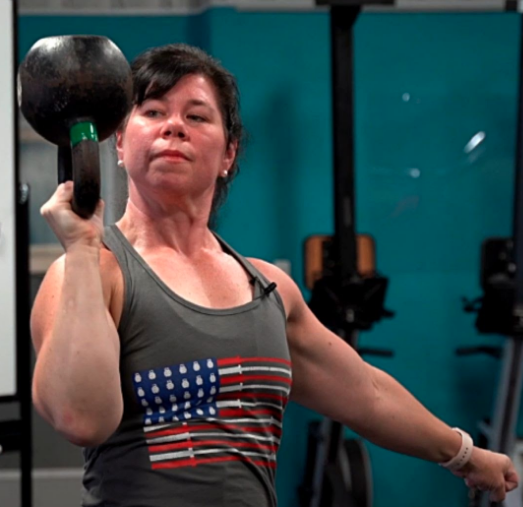
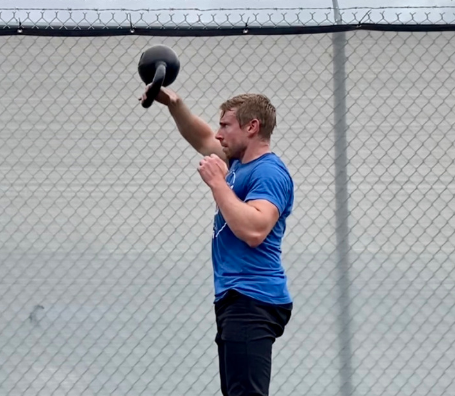
Bottoms-up Clean + Carry
The design of the kettlebell offers a truly unique way to train the shoulders and core. When held upside-down (“bottoms-up”), the bell’s center of mass is perched high above your hand.
This balancing act forces your grip, arms, shoulders, rotator cuff, and core to fire in coordination to stabilize the bell. In short, using the kettlebell bottoms-up is one of the best ways to build functional strength.
Start by gripping the kettlebell handle aligned perpendicular to the body. Here’s a tip to be sure your grip is correct – lean forward on the handle as if you were going to perform push-ups. Your wrist and forearm should feel stacked and secure.
Grip tight, hike the bell into a backswing, and stand up, bringing the bell up to the shoulder in the bottoms-up position. Use your free hand to guide the weight and prevent it from falling or crashing into your shoulder or face.
Once you’re comfortable cleaning the kettlebell bottoms-up and holding it steady, add dynamic movement with the lower body to amp up the challenge for the core and balance.
Start by marching in place, slowly bringing the knees higher as your balance allows. Turn the march into a carry by simply walking around with the weight.
The bottoms-up clean + carry is one of my favorite exercises because not only are you working your entire body, you’re also practicing a valuable strength skill – holding isometric tension with one part of the body while dynamically moving with the other.
Goal – 30s carry each side. Men – 16 kg / Women – 12 kg.
These are a few of the low-risk, high-yield exercises I use to quickly get new clients moving safely with a kettlebell.
Every exercise you do should have a purpose behind it.
Each of these moves is a great exercise in its own right and will develop the physical skills you’ll need as you progress with your kettlebell training.
Want more?
Check out my new kettlebell ebook and training course:
“You’re looking Zacked. It’s like jacked, but better.” — Matthew Sprinkle
Welcome to the first installment of Get Zacked, a celebration of broing out and all things flex.
In this series, you’ll learn my favorite bodybuilding-inspired tips and techniques to build muscle, get an epic pump, and increase the almighty mind-muscle connection.
Today we’re spicing up the classic dumbbell bench press.
Many lifters have a hard time consistently activating the pecs with traditional barbell bench presses (myself included), forcing the triceps and front delts to take the brunt of the work.
In this exercise, we’ll play with bench angles, joint position, and range of motion to get the pecs fired up.
Here’s how:
Set up a bench to a low to moderate incline -2 or 3 clicks. Bonus – you’ll get to check yourself out in the mirror.
Grab a pair of dumbbells (something you can handle for 15 reps).
You’ll be pressing “see-saw” style with the arms moving in opposing directions at the same speed. When one side locks out at the top, the other reaches the bottom.
Perform a “corkscrew” rotation with the arms. At the bottom, the palm faces your head or same side shoulder (resembling the top of a bicep curl). This will allow the elbow to sink safely, increasing the range of motion and stretch on the pec.
As you press up, internally rotate the arm into a traditional “punch the ceiling” position. Give the working side pec an extra squeeze to move the arm slightly more toward the midline.
Remember, move the arms with equal speed in opposite directions.
Focus on the simultaneous “stretch and squeeze.”
As fatigue builds up to around RPE 8, increase the speed and shorten the range of motion to really blast the chest. Don’t worry about counting reps. Just keep the presses smooth and under control and keep pushing.
A quick note for those who normally train bench press with a big powerlifting style back arch:
Resist using that technique here.
Arching the back to force the chest up is great for lifting heavy weights while keeping the shoulders safe. But when on an incline, the arch essentially “flattens” the press angle, thus defeating the purpose of the incline entirely.
Keep a more subtle arch and pull the shoulders down to both maintain upper back tightness and take full advantage of the bench angle.
I’ve been using this dumbbell chest press variation as a way to get the pecs fired up during warm-ups and as an intense finisher.
For warm-ups:
10 presses each + 30 seconds pump
8 presses each + 30 seconds pump
6 presses each + 30 seconds pump
Increase the weight each on each set.
Rest a minute between sets or superset with a pulling exercise.
As a finisher:
Grab a medium to heavy pair of dumbbells and set a timer for 2 minutes.
Get as many slow, full range of motion presses as possible up to RPE 8 (shoot for around 6 reps each), then pump ’em out for the remainder of the time.
Kettlebells have been pretty hard to find this year.
Quarantine mandates set off an unprecedented run on home fitness equipment that left manufacturers struggling to keep up with demand.
Thankfully, it looks like most retailers are catching up on stock… but Black Friday is quickly approaching.
It seems the rest of the world is catching on to what us fitness nerds have known all along – a good set of kettlebells at home is worth its weight in gold, or at least a monthly gym membership.
If you’ve been thinking about starting or upgrading your home gym (whether that’s a corner of your bedroom, or a full two-car garage), this article will tell you exactly what you need to know about kettlebells, how many to get, where to buy them, and how to put them to good use.
And if you already have a bell or two, I’ll share some ideas on how and why to expand your collection.
Let’s dive in.
Why use kettlebells?
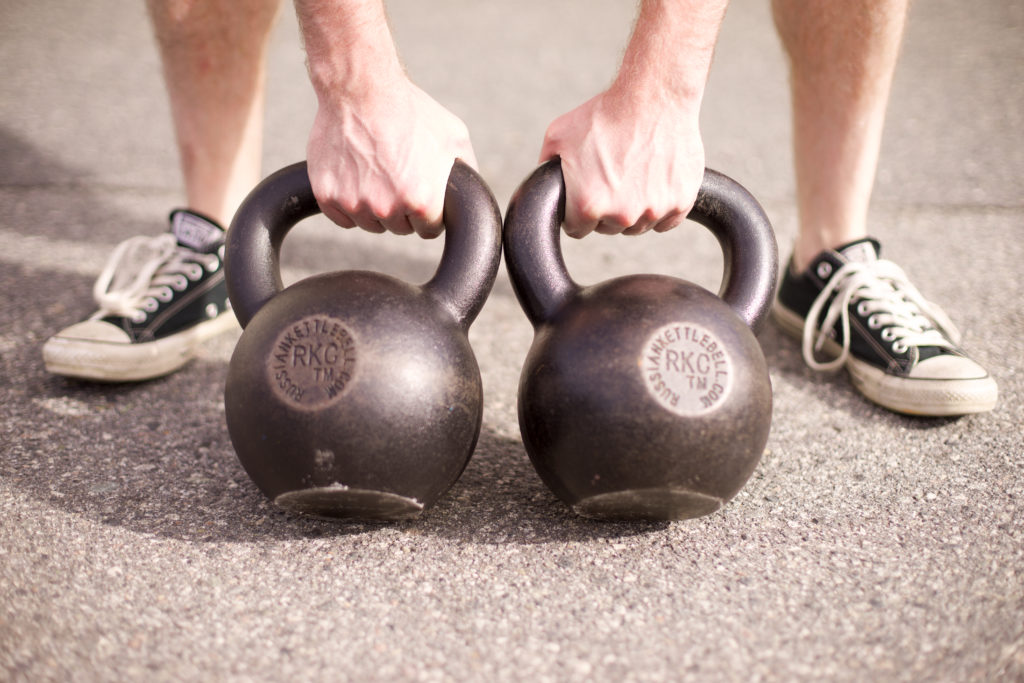
A kettlebell is a free weight with a simple design – a flat-bottomed cannonball with a handle up top.
And when it comes to getting effective strength and cardio workouts done at home, a kettlebell just can’t be beat.
The design of the kettle offers three distinct advantages over it’s “bell” brothers, the dumbbell and barbell:
1) Kettlebells take up less space
Kettlebells don’t need a rack for storage or require extra weight plates. They sit flat on the floor (no rolling around) and the compact design means no wasted space.
In fact, my own home-use set of 9 bells fits on single welcome mat.
2) A single kettlebell is extremely versatile
To get the most out of a barbell, you’ll need lots of plates (a great benefit of barbell training is the ability to increase weight in micro jumps), a squat rack, and a bench. If deadlifting heavy or Olympic lifting, a platform is mandatory.
Likewise, dumbbells are a great training tool, but you’ll need a lot of them to get an decent full-body workout. A pair of 15 lb dumbbells might be all your shoulders need, but won’t do much for your legs.
Armed with some savvy training knowledge (you will be by the end of this article), you’ll be able to get a great total-body workout with only 1-3 kettlebells, no matter your strength level.
Plus, you never really outgrow the lighter bells. There are unique uses for each size. (I still use the first kettlebell I ever bought, 10 years later)
3) Kettlebells are beginner-friendly.
As a fitness coach, my goal is to get new clients feeling comfortable and confident while lifting weights and learning basic movement patterns.
Squats and deadlifts, in particular, are key exercises that many new lifters struggle with or are intimidated by. Jumping right into the barbell variations is rarely a good idea.
Again, the design of the kettlebell comes to the rescue and makes learning these moves a cinch. Because the bell’s center of mass is directly under your grip, deadlifts fly up naturally without much cueing.
In fact, I regularly have grandmas lift 70-100 lb kettlebells on their first session. They insist the KB feels easier than a suitcase half as heavy. Kettlebell squats, likewise, seem to correct many technique issues almost automatically.
What are kettlebells good for?
The kettlebell is the Swiss Army Knife of fitness – you can do just about anything with it.
It’s not a magic pill or silver bullet. You still have to put in the work, and do so consistently, to see results. But no matter your goal, or where you’re starting from, kettlebell training can transform your body and performance in ways you never thought possible.
Kettlebells for Weight Loss
Losing body fat and maintaining a lean physique comes down to controlling calories through nutrition and training. Kettlebell training offers many powerful ways to rev your metabolism and burn a mountain of calories in very little time.
When it comes to getting the most fat-burning bang for your buck, the swing is king.
The kettlebell swing is a hip hinge dominant movement, like a deadlift or box jump. This means each and every rep engages the posterior chain muscles of the hamstrings, glutes, back, and lats (plus lots of core if you do them right).
When working all these large muscle groups dynamically at the same time, your heart rate jumps and you enjoy a calorie burn akin to a sprint (without the impact on the joints).
Of course, any exercise can help you lose weight, but the kettlebell swing (and its big brother – the snatch) is a one-stop-shop for anyone looking for a simple and proven approach to cut body fat while building functional strength.
Kettlebells for Strength
As mentioned above, kettlebells are a great way for beginners to learn the fine art of strength training.
The foundational kettlebell lifts cover all the major movement patterns while developing athleticism and a strong mind-muscle connection.
Squats and swings build powerful and mobile hips – the keystone for every truly strong athlete.
Row and press variations (especially bottoms-up) build resilient shoulders and a guaranteed ticket to the gun show.
The infamous Turkish Get-Up is a classic hybrid lift that will revolutionize how you feel and use your core.
Kettlebells are known for boosting strength and breaking plateaus for even the most seasoned strength athletes. This “what the hell” effect takes place when, after using kettlebells for a while, new reserves of strength and skill suddenly appear to demolish stubborn old personal records. This is why I always program some amount of kettlebell training for my powerlifting clients.
Kettlebells for Endurance
Endurance is highly dependent on the sport, activity, or skill being performed.
For example, a long-distance trail runner might flounder after a couple laps in the pool… and a swimmer might find cycling tortuous. This is why triathlons are so tough and require specialized training.
Kettlebell training is optimal for a type of endurance called general physical preparedness (GPP).
In simple terms, by working the entire body with higher reps and moderate weight, you increase overall work capacity.
GPP is the generalist approach to cardio and conditioning.
You won’t be the absolute best in any one field, but you’ll be in great shape and ready to handle a broad range of activities – from pickup basketball to packing a U-Haul.
The benefits of kettlebells run deep and this is just a cursory look at what smart training offers.
How Many Kettlebells Do I Need For A Home Gym?
Over the years, I’ve invested in nearly 30 kettlebells (a hodgepodge of different sizes, styles, and brands).
Yet the handful of bells I keep in my living room are enough to equip most any workout, even with a training partner or two.
You see, 80% of your kettlebell training can be covered with just 3 bells…
A lighter bell for upper-body lifts like presses, get-ups, halos, windmills, and arm-bars… as well as for learning advanced lifts like cleans and snatches.
A heavier bell for deadlifts, swings, carries, and squats.
A moderate bell to progress in your upper body strength and advanced lifts. Plus, a medium weight is ideal for kettlebell complexes – the stringing together of multiple lifts into a larger continuous set.
Now the question is which 3 bell sizes do you need?
What Size Kettlebells Do I Need?
Most kettlebells come in 4-kilogram increments.
A “full set” runs the scale like so – 8kg, 12kg, 16kg, 20kg, 24kg, 28kg, and 32kg.
Kettles come much heavier than these (the 48kg “Beast” is the cherry on top most collections), but we’re focusing on the sizes with the most value for beginners.
The nearly 9-pound jump between sizes is another quirk that makes kettlebell training unique.
It’s a creative constraint.
Without the option of increasing weight in small steps, you are forced to make progress in various other ways with the same bell – volume (more reps), density (less rest), and variations (there are dozens of ways to perform a lift) are the big ones.
Your strength and physical skills really blossom with this approach of getting everything you can out of a single kettlebell.
Unfortunately, I have to make broad generalizations when it comes to making kettlebell size recommendations.
I provide more context so you can make the best choice for yourself, but here’s the thing…
No matter your sex or fitness level, nearly every bell size has great value and there’s plenty of overlap in the recommendations anyway.
After all, there are only so many kettlebell sizes to choose from.
I’ve broken recommendations into two sets of three bells.
Your 1st set of kettlebells should cover all your training needs for your first six months and most of your needs for life.
A good first set of bells should include a weight that’s light enough to safely use with overhead work, a weight heavy enough to tax the posterior chain with swings and deadlifts, and something in between.
Look at getting a 2nd set after you’ve been training consistently for six months and have a confident grasp on the fundamentals.
A good second set of bells should include a heavy weight to cover your swing and squat needs (you’ll probably never need anything bigger) and completes your first pair of weights for double kettlebell work.
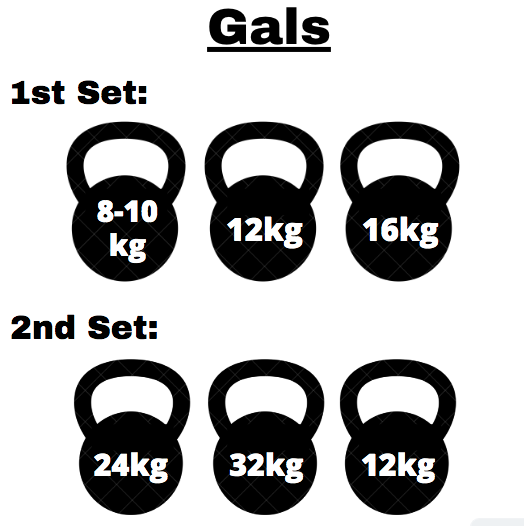
Kettlebell Weights for Women
Your lightest kettlebell should be something you can confidently press overhead for 5 reps. Typical sets begin at 8 kg (18 lb), but 10 kg (22 lb) might be a better fit if you’re on the stronger side. Plus, it makes that first jump in weight up to 12 kg much more manageable.
The set rounds out with 12 kg (26 lb) and 16 kg (35 lb). These are your “bread ‘n butter” weights that will serve you well in both lower and upper body training for life.
Swing and squat strength tends to grow faster compared to the upper body lifts and is why I suggest jumping up to the 24 kg (53 lb) and 32 kg (70 lb) bells.
Finally, the extra 12 kg will give you a great pair for double kettlebell workouts. Of course, you might want this first pair to be lighter (8-10 kg) or heavier (16 kg) depending on your strength level.
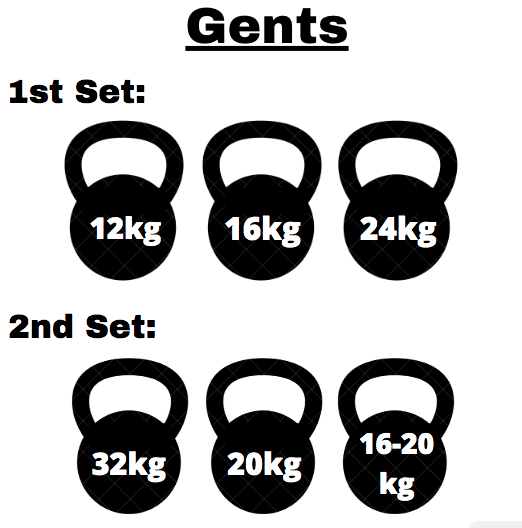
Kettlebell Weights for Men
We follow the same line of reasoning for the fellas, with an assumption of more general upper body strength.
As you can see, most of the weight recommendations end up the being the same. Again, this is why a core set of bells can be used by just about anyone to great effect.
We start with 12 kg as even the brawniest of dudes will get good use from one for mobility-oriented lifts like arm bars and windmills as well as advanced get-up and bottoms-up press work.
While the 24 kg will be your go-to weight for many upper and lower body lifts, the 16 kg is a handy option for higher volume workouts and technique practice.
Looking forward to the next set, most guys will get great use out of the 32 kg for swings and maybe even presses.
From here, I like to recommend a pair of 20 kg (44 lb) kettlebells as this seems to be a sweet spot for double bell complexes. Of course, depending on your strength progress, you could snag another 16 kg or 24 kg to complete a lighter or heavier pair.
Where To Buy Kettlebells
With the rise of at-home functional fitness, more and more retailers are jumping into the kettlebell game.
Unfortunately, many are simply cashing in on the hype as the market becomes flooded with cheaply-made bells. Plus, most weights you see in stores are barely heavy enough to hold a door open, much less be of any use for training.
The good news is there are plenty of trusted online sellers that offer quality kettlebells.
Here’s my top-5 list of recommended kettlebell brands and merchants based on my own personal use (all links are affiliate):
To be fair, each brand of bell will differ slightly in dimensions, casting, and finish used.
Like a pair of jeans, some will fit your body and preferences better than others. Do some research and, if possible, get your hands on a few kettlebells at a local gym first.
But don’t rack your brain.
Really, you can’t go wrong with any of the above recs. They won’t run out of batteries, there’s no monthly fee, and will last a lifetime.
Your success, in the gym and in life, hinges on habits and your ability to create them. By using a simple 5-minute timer, you can literally push “start” on new habits and maximize your progress each and every day.
It’s been said life is the sum of your habits.
I wouldn’t go *quite* that far.
After all, the whims of life that you can’t control (when, where, and how you were born and raised) can play a substantial role in how the rest of life shapes up.
BUT, as adults on the path to betterment, we have a responsibility to make changes where we can.
As a coach, it’s my job to help you align your mindset and lifestyle to make those changes happen.
All the best advice in the world won’t do any good if you don’t translate what’s on paper into real-life action.
I like to view the process in this way:
It’s all about practicing what strong/lean/athletic (fill in your goal) people do…
Not “I need to lose 10 pounds in a week.”
The latter is a pass/fail attempt – you don’t succeed until arbitrary numbers on the scale and calendar match up.
The former (the practice approach) is accessible every day by making small progress at the source – your behavior.
I work with real people.
Some are snarling beasts that you can’t keep out of the gym for more than a day…
Some are only just beginning to experience the magic of training…
But they’re all busy squeezing every minute out of life between work, family, and (gasp) other hobbies that don’t include lifting weights.
Everyone’s situation is unique.
But they all have little pockets of time that can be used to supercharge results – whether that’s fat loss, building muscle, gaining strength, or learning new skills.
What’s a habit (and why should you care)?
According to Charles Duhigg, a habit is an action that starts as a choice and eventually becomes a nearly unconscious behavior pattern. Science suggests that ~40% of our daily actions are directed by habit.
It makes sense, too.
Our brains love efficiency and predictability.
But the “path of least resistance” isn’t necessarily the easy road – just the one we’ve been down before. The one we know best. The predictable one.
Humans do what they’ve always done.
We see this in everything from relationship dynamics to how you eat fast food – burger or fries first?
Now, I’m not saying people can’t change.
Of course they can. Otherwise, I’d have no job and humanity would have no hope.
But I am saying, barring a life-altering satori moment, it takes a number of “wins” and a certain momentum in a particular direction for lasting change to sink in.
The cool thing is we can change our scripts with just a bit of work.
In a way, we are both the almighty creative computer programmer AND the hard drive.
We’re not complete automatons, yet.
Momentum > Motivation
Here’s an essential coaching truth:
Momentum always beats motivation.
We see this every year. Just peek inside a gym in January… then come back in October.
The difference is the “fuel” these folks are running on. One group is burning through the sugar-high of a new year’s resolution. The other is cruising on the slow-burn of habit.
Peeling yourself off the couch is the crucial first step. Anything that breaks the hold of inertia is ok in my book – be it a resolution, a motivational video, or a nasty breakup.
A quirk of human psychology is that we’ll move mountains to avoid pain but barely lift a finger to gain pleasure. The “stick” often gets things moving faster than the “carrot.”
But I’m not here to twist the knife.
I just want to be sure once you start moving, you KEEP moving… long after the initial jolt of energy has worn off.
Because consistency counts.
One salad won’t melt off stubborn body fat.
And one arm workout, no matter how intense, won’t rip those schmedium shirt sleeves.
Consistent action compounds over weeks and months before the magic sneaks up on you.
Runners know this – the endorphins take a while to start pumping, usually after pushing through the urge to quit. But when they kick in, an extra mile or two is no problem.
You’re already rolling, so why stop? The extra mile is never crowded, as the saying goes.
Everyone else is crowding the starting line debating the best shoe or warm-up routine while you’re setting new personal records.
Ask anyone who’s maintained a fit lifestyle for more than 10 years and they’ll tell you the same thing – it’s actually easier to workout than not.
Bodies in motion tend to stay in motion.
Success is a few simple disciplines, practiced every day; while failure is simply a few errors in judgment, repeated every day.
Jim Rohn
Strategic Laziness
Time, once again, to steal from Dan John.
If we had to reduce the path of success down into 2 steps, it would be hard to beat these:
1) Show up
2) Keep going
The key is to make “showing up” as easy as possible, at least at first.
When I worked in a commercial gym, missed sessions (no-shows) were an everyday occurrence. Hundreds of my on-the-clock hours were wasted in the early days before I served a stable client base.
I’d spend half the day fielding last-minute texts explaining bad traffic, various seasonal ailments, and other pressing demands on time.
Sometimes a client or prospect would ghost, never to be seen in the gym again. It was maddening.
These days, I train clients in the comfort of their own home.
In past 3 years, I can count the total number of missed workouts on one hand.
The difference?
My in-home clientele just have to roll out of bed. Literally.
Gone are the annoyances of hair care, makeup, and shoes, much less an extra commute.
This “strategic laziness” saves precious willpower and all but guarantees adherence.
For most people, cramming a gym habit into an over-stuffed schedule proves to be unsustainable… even when a not-so-cheap personal trainer is expecting you to show up.
The lesson here?
Aim low.
That sounds patronizing, but there’s great truth to it.
Jung said people don’t see God because they look too high.
Most answers are right under your nose and are probably more simple than you imagine.
Let’s lower the barrier to “showing up” with a simple trigger – something that tells you “Ok, it’s time to do this NOW.”
The works of Charles Duhigg (Power of Habits) and James Clear (Atomic Habits) detail the habit cycle like so – trigger, action, reward.
Many habit triggers remain hidden from our awareness, but we can literally press our own buttons to get going with whatever we need to do.
The tactic I’ll suggest will be a game-changer no matter your fitness/skill level or goal.
Progress With The Push Of A Button
You might be a beast in the weight room…
But there’s always something to improve. Maybe your shoulder bugs you, or you have tight hips, or you skip abs.
On the other hand, maybe you’re just starting out and looking to get a grasp on a fit and healthy lifestyle.
No matter where you are right now, you can use the simplicity of pushing a button to make real progress and gain momentum towards your goals.
Amazon, Netflix, and Uber Eats stay on our home screens because they deliver the goods fast and easy.
We are easily hooked on the quick turn-around time between the click and the reward.
Let’s use this to our advantage in our quest to look and feel our best.
“I know what I should do, but I just can’t get myself to do it!”
Sound familiar?
Don’t bite off more than you can chew. In fact, just take a nibble.
Let’s shrink the process down into easily digestible steps – potato chips, not T-bone steaks.
Step 1 – Grab a simple kitchen timer and set it to 5 minutes. I like one with a magnet to keep on the fridge.
Step 2 – Each day, you’re going to pick a simple action to perform. Something that lines up with your goal or training focus (lots of ideas in the next section).
Step 3 – Tap start and commit to performing the action with complete focus for the next 5 minutes.
Step 4 – The timer beeps. Bask in the feeling of accomplishment and know you’re a little bit better than you were 5 minutes ago.
Notice the habit cycle at play:
The trigger – click the button.
The action – do the thing.
The reward – feeling better with the beep.
There’s just one piece missing – the cue. What will prompt us to click the habit button?
This is the first domino that sets off the entire process.
Our cue can come in various forms.
It could be a time on the clock, a physical location, or a pre-existing habit like brushing your teeth.
Being bored, stressed, and tired are very powerful cues. Be aware of what you’re doing in those times.
Eventually, pushing the habit button will edge-out mindless behaviors like social media scrolling, munching on junk snacks, and binging Netflix.
Listen, I love a good Jocko or Goggins or GaryVee mashup about pushing through pain, hustling till 3a.m. or making valiant efforts of self-sacrifice.
But, honestly, can I do any of that right now?
As a coach, my goal is to stack wins for you.
Tried a new exercise? That’s a win. Lifted more rep than last week? Win. Just showed up? WIN.
This isn’t coddling.
I’m not suggesting we over-inflate egos or praise mediocre effort. This is about recognizing every step in the right direction for what it is – a step! String enough of them together, and we really get somewhere.
Now ask yourself – what could I be doing more of that would really move the needle?
Stretch? Hydrate? Take a deep breath? Text an old friend?
Click and get down to it.
Why 5 minutes? Most any excuse evaporates with a such a shallow commitment.
And yet, let me tell you – 5 minutes goes a lot farther in real life than it seems on paper.
In fact, my buddy Max Shank built an entire program and training community around simple 5-minute movement flows. This coming from a guy who can perform mind-blowing feats of strength. Yet, he found, like so many savvy coaches, that it’s the LITTLE stuff, not the fancy stuff, that makes a huge difference for real people.
When the timer runs to zero, you’ll feel amazing as those beeps chime out. That feeling is the reward.
You’ve accomplished something, taken a step, kept a promise to yourself, and it took practically no time at all.
Here’s an inspiring truth – and in case your momma didn’t tell you – you can get better at anything with enough practice…
You probably won’t be the best in the world, and maybe not even in the top 20% as is the promise of so many “hack” gurus. But what’s the point in comparison, anyway? We’re in the pursuit of better, and that can happen DAILY, if not multiple times per day, if you measure progress the right way.
The 5-Minute Flow Buffet of Options
What do you do when the clock starts running?
Anything your body needs! And that probably means whatever you’re not already doing on a regular basis.
Here are a few of my go-to ideas:
Hands & Feet – Make fists with the fingers and toes, then spread them out. Draw circles and figure 8s with the ankles and wrists. Do calf raises and wrist push-ups.
Shoulders – Make big arm circles and swings (think of a swimmer getting warmed-up). Try the Egyptian twist and the tea cup rotation.
Core – Any plank or crawl variation.
Legs – Any lunge or squat variation.
Of course, you can string moves together into a yoga-inspired flow. Our bodies crave novel movement.
The kettlebell is an obvious choice for getting in lots of work in a short amount of time. Try the Humane Burpee or this lunge flow (you can find many more quick kettlebell workouts in the Facebook group).
And when I don’t want to think too much, I’ll just walk around with a kettlebell (suitcase carry) and focus on my breathing.
Let’s say you’re focusing on a specific lift in your training and want to dedicate all your energy to improving it. This is the perfect opportunity to shore up any areas that will support your efforts.
For example, if the back squat is your priority, dedicate your 5-minute blocks to hip mobility and core engagement – goblet squats and hip rocks are a great place to start.
One quick point…
This bite-sized approach to habit building does not negate or take the place of deep work performed in long, uninterrupted blocks of time.
Mastery of any craft depends on lots of time in a flow state.
There’s no skirting around the mandatory hours at the writing desk, the canvas, or under the bar required to be world-class.
But, we can get a long way towards maximizing our day (and our potential) by taking small, consistent action.
Big doors swing on little hinges. And we know that consistency, all else equal, is THE difference maker.
The problem with 12-week programs is that success is 3 months away. It’s hard to suffer the stick so long before getting the carrot.
What we need is to shorten the reward cycle. A lot. 5 minutes seems like the sweet spot.
Keeping promises to yourself is a most powerful habit.
Drinking a glass of water can have just as big of an impact as doing “no carbs in October” if you have the right mindset.
But with the wrong mindset, even if you make it all the way to Halloween before succumbing to your sweet tooth, you’ll chalk that up as one giant loss as opposed to 30 little wins. The difference is night and day.
Years back, I invested a few hundred dollars and dozens of study hours into a certain gold-standard nutrition certification.
I studied the ins-and-outs of digestion and metabolism. (Honestly, all stuff I’d read in 10th grade biology class but never cared to really learn… Otherwise, I might have reconsidered the all the sketchy cafeteria pizza and orange Fanta.)
Nutritional science is important, but the cert’s coaching system really centers on simple habits…
You know, stuff that your grandma (who never counted a macro in her life) probably told you… Drink your water and eat your vegetables. Cake is for birthdays, not breakfast. Chew your food and be grateful.
If the brightest minds in science and coaching hang their hat on habit formation, it’s worth taking a serious look at.
So, nudge yourself forward, nurture momentum and you’ll be surprised at how far you can get 5 minutes at a time.
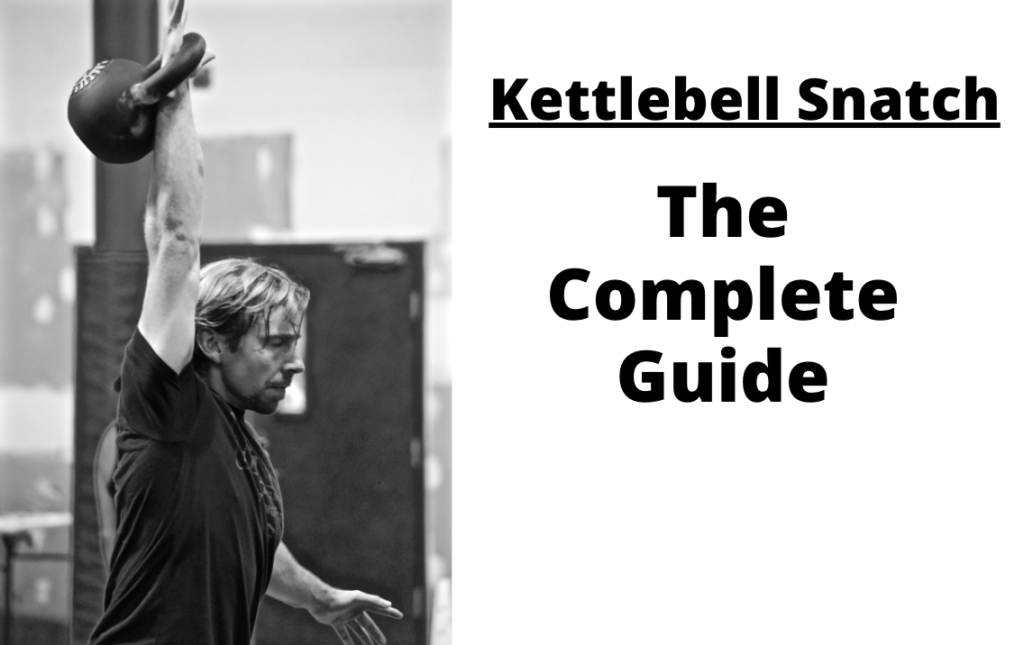
I get a ton of questions about kettlebell snatches from clients and readers, so here it is – your complete to guide on how to kettlebell snatch with proper form, common mistakes to avoid, and workouts to try.
Enjoy!
What is the kettlebell snatch?
The kettlebell snatch is an explosive, full-body exercise. It’s often considered among the most challenging of kettlebell lifts for two big reasons:
1) You’re moving a weight over the most distance physically possible (without letting go) – from the floor to overhead.
2) It’s fast. The only way to snatch a kettlebell is with speed and precision. You can’t do it slow and the only “resting” point is holding the kettlebell motionless at the top lockout.
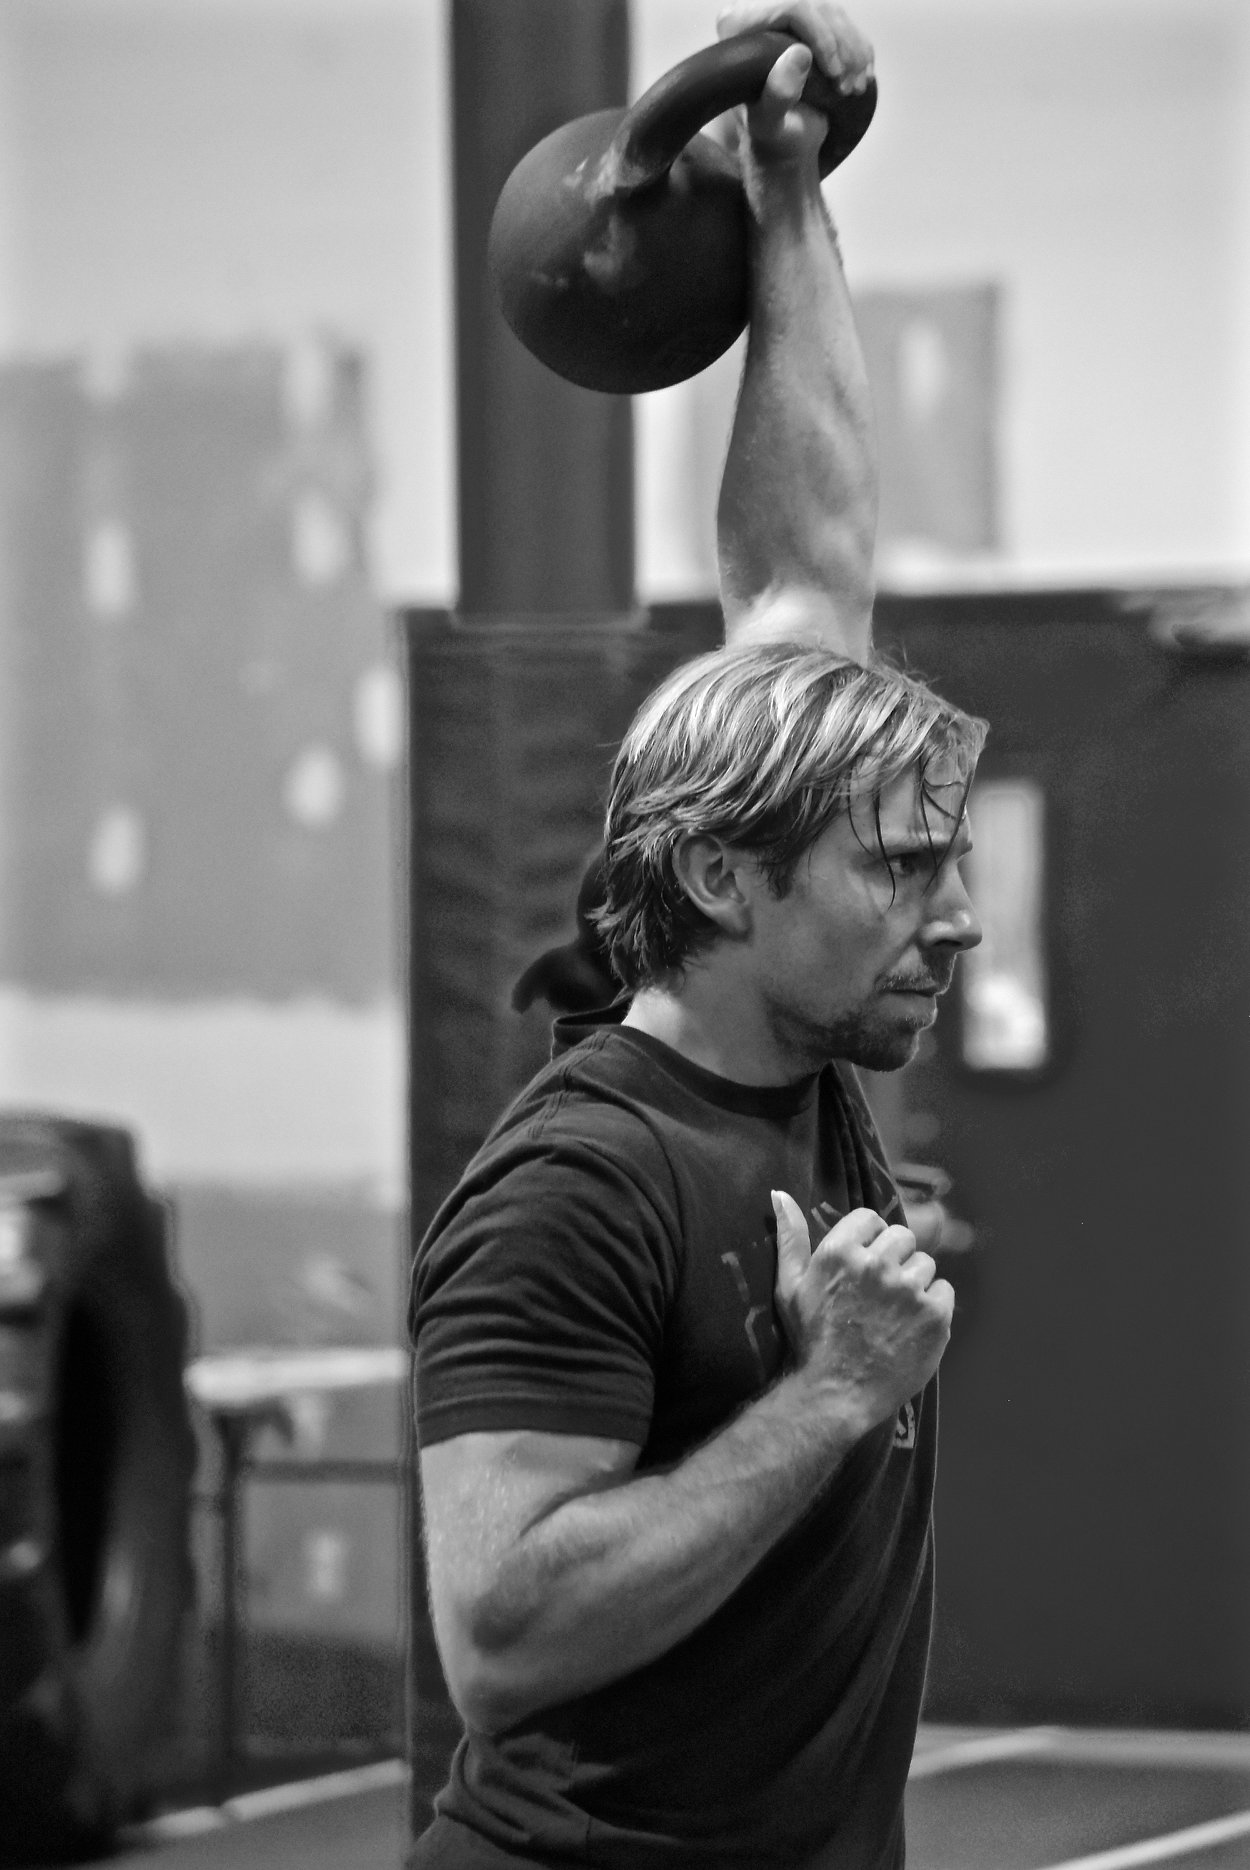
From start to finish, the athlete hike passes a kettlebell into a hip hinge. Once the hips extend (as in the swing), the kettlebell is directed upwards and is “punched” into a locked-out overhead position (as in the military press). The kettlebell is then directed downwards until the hips “catch” the weight and the rep is repeated from the backswing or returned to the ground.
https://www.instagram.com/p/BtWODkthdtH/
As you’ll soon find out, what happens in between the punch and the catch makes all the difference.
The kettlebell snatch is a true hybrid lift in that it builds strength, cardio, and power with every rep. Launching and stabilizing a heavy weight over your head requires a tremendous effort from every muscle in your body.
The start of the kettlebell snatch resembles a swing or deadlift. It is a hip hinge and thus engages the mighty posterior chain of hamstrings, glutes and spinal erectors.
This team of mighty muscles provides the “pop” and power that allows the kettlebell fly up without being pulled by the arms; like the initial rocket boost that launches the space shuttle out of Earth’s atmosphere.
Once the hips and legs lock out, the bell begins its journey skyward and that’s when the upper body takes command. (Of course, the quads and glutes remain tight to give you the rock-solid foundation you need to snatch safely and efficiently.)
In a flash, the core, pecs, lats, and upper back all coordinate to direct the kettlebell upward (not outwards like a swing).
The cherry on top of this sinister cupcake is the “punch” wherein the arm straightens out and absorbs the weight, supported by the triceps, shoulder girdle, and lats.
No muscle in your body comes out unscathed. Even your biceps and forearms get hit hard in this game of catch between hips and shoulders.
After a few snatches, you’ll feel as if you just ran up 5 flights of stairs with a full grocery haul – heart pounding, legs burning, and lungs suddenly wondering where all the air went.
In short – the snatch is tough and not for the beginner. Or faint of heart.
The kettlebell snatch delivers plenty of hard-earned benefits:
a massive calorie burn in little time
added muscle to the upper back and shoulders
explosive hip power and hamstring strength without jumping
high intensity cardio endurance without running
the work capacity to sustain long, punishing efforts like moving a couch, hiking a mountain, or practicing martial arts
Yes – the juice is worth the squeeze, but it will take patience and persistence to get it right. The good news is that with a smart training plan, you’ll be able to avoid many of the pitfalls folks fall into when making a run at this exercise.
*Note – this article details my own training approach and interpretation of the hardstyle kettlebell snatch. Though they share a common name, the kettlebell sport snatch and barbell snatch (an Olympic lift) utilize different techniques and shouldn’t be confused with each other.
Before We Snatch —> 2 Kettlebell Pre-reqs
Before we dive into the full technique breakdown of the snatch, let’s make sure we have some prerequisites in order.
We must learn the snatch with safety and efficiency in mind. Doing so means using the strength and skills we develop through simple, foundational training.
A strong snatch depends on two major physical qualities:
Hip power and endurance
Shoulder mobility and stability
The hips and shoulders must coordinate in the blink of an eye to launch a kettlebell precariously close to, and past, your beautiful face – rep after rep.
Learning to snatch is no easy task, but you can expedite the process by ensuring you have a few performance standards under your belt.
1) Swings with a heavier kettlebell.
Hips drive the bell.
Again:
HIPS DRIVE THE BELL!
Your glutes are your engine, your source of power. And there’s no better way to train hip power than the kettlebell swing.
In fact, there’s a ton of overlap in the swing and snatch techniques – the critical “load and explode” phase is exactly the same.
So, if you expect to snatch a certain kettlebell, it should be easy to swing.
Here’s what I look for:
20 reps of 2-handed swings with a kettlebell 8kg+ heavier than your snatch weight.
10 reps of 1-handed swings with a kettlebell 4kg+ heavier than your snatch weight.
The swings should be strong, snappy, and have some decent height.
All good?
Let’s move up to the shoulders.
2) Turkish get-up with the snatch-sized bell
If you’re gonna snap and catch (is this where “snatch” comes from!?) a kettlebell in mid-air, you’d better be able to own that weight in various overhead static positions.
The TGU is an obvious choice for testing how your arms and shoulders hold up under stress.
The get-up sequence takes your shoulders from a horizontal press angle to a vertical press angle, hitting a bunch of in-between spots along the way.
A nice slow and controlled TGU should take 30-40 seconds per side, enough to demonstrate adequate endurance.
Show strength and stability (on both sides) with a certain kettlebell and your shoulders are probably ready to snatch it.
Kettlebell Snatch Technique Breakdown
The snatch should look as smooth and natural as a big ocean wave.
Like surfing, your goal is to delicately harness the powers of gravity and momentum to ride the wave to your destination.
The snatch has only two “resting” points – the ground and overhead – and there’s a lot that happens in between.
In fact, there are no fewer than 10 steps you need to know to snatch seamlessly.
Let’s take a look:
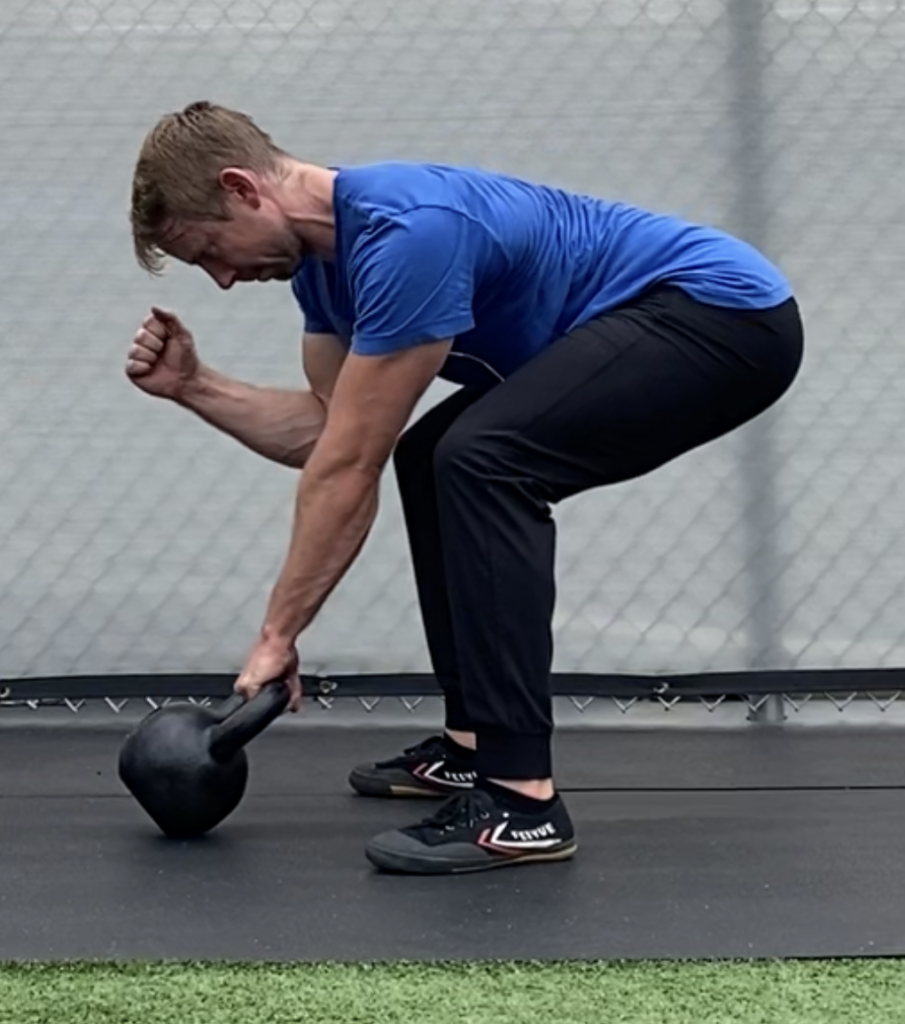
1) Set-up
Stand at arms-length behind a kettlebell, find your hip hinge “wedge,” grab the bell with one hand, and tip it back towards you. Look ahead, but don’t jam the neck.
Your pecs and lats should be tight – they’ll play a crucial role through the entire rep.
2) Backswing
While keeping the arm straight, pull the kettlebell up and back into the groin area by tensing the lats and triceps (think of a straight-arm lat pulldown).
The forearm makes contact with the inner thigh as you maintain the hip hinge position – knees bent, butt back, chest up. Keep your feet rooted and evenly balanced from toes to heels.
This is the “load” phase, like the pulling back of a bowstring.
3) Hip snap
With the hamstrings, glutes, and back all stretched under tension, squeeze the glutes to drive the hips forward and stand up with a snap.
A couple points here:
> Keep solid contact between the forearm and inner thigh to prevent the kettlebell from falling down or forward (pecs and lats!).
> The hip snap ends with a tall, neutral posture. Watch the tendency to lean back and push the hips too far forward.
Only once the hips have extended does the kettlebell travel forward. This is the “explode” phase, like the launch of an arrow off the bowstring.
These first 3 steps remain constant when performing any kettlebell ballistic lift. Until the ascent, nobody should be able to tell if you’re about to swing, clean, or snatch.
4) Ascent
At this point, all the hard work has been done by the hips and the goal is simply to direct the trajectory of the floating kettlebell.
There are two points to consider:
> Keep the bell close to the body as this will ensure a smooth transition to the overhead lockout.
After the hip snap, bend the elbow and pull it slightly back to direct the kettlebell vertically.
> Keep the bell more towards the midline of the body to prevent getting your arms yanked off to the side.
The pecs and lats act as guides to keep the arm and shoulder exactly where you want them. By keeping the pec engaged, you prevent the arm from moving too far out to the side.
Of course, some lateral travel will be necessary because we have to stack the kettlebell over one shoulder, but that should happen naturally in the next step.
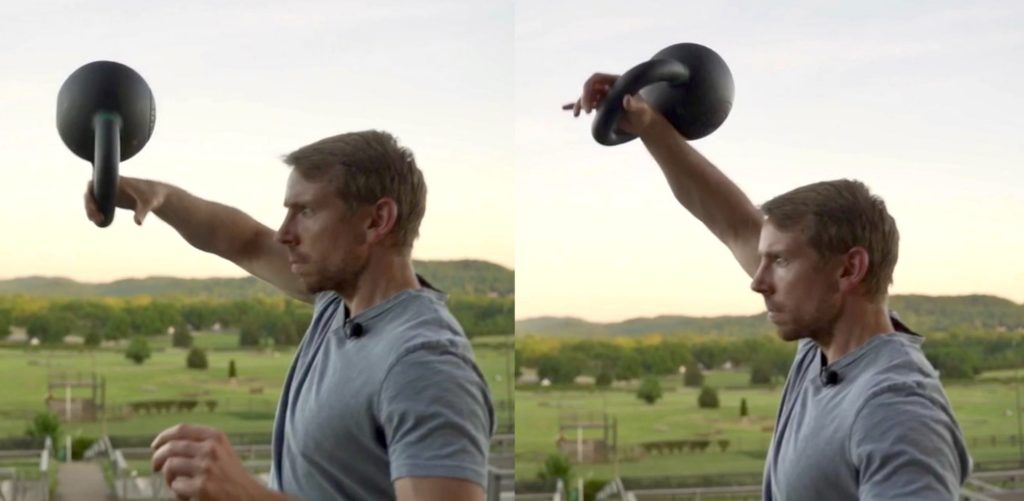
5)Spear
This might be the most nuanced step and, admittedly, is the hardest to coach.
Assuming you launched with good hip power and kept the kettlebell close, it should still be free-floating and feel nearly weightless as it travels past head-height.
Now you must move your hand so the belly of the bell lands smoothly on back of the forearm.
Do this by spearing your hand through the handle, adopting a press grip – the handle settles deep into the palm lying diagonal from the thumb webbing to the pinky-side base of the palm – all in midair.
Making this move early (just over head-height) guarantees a smooth landing with the lockout.
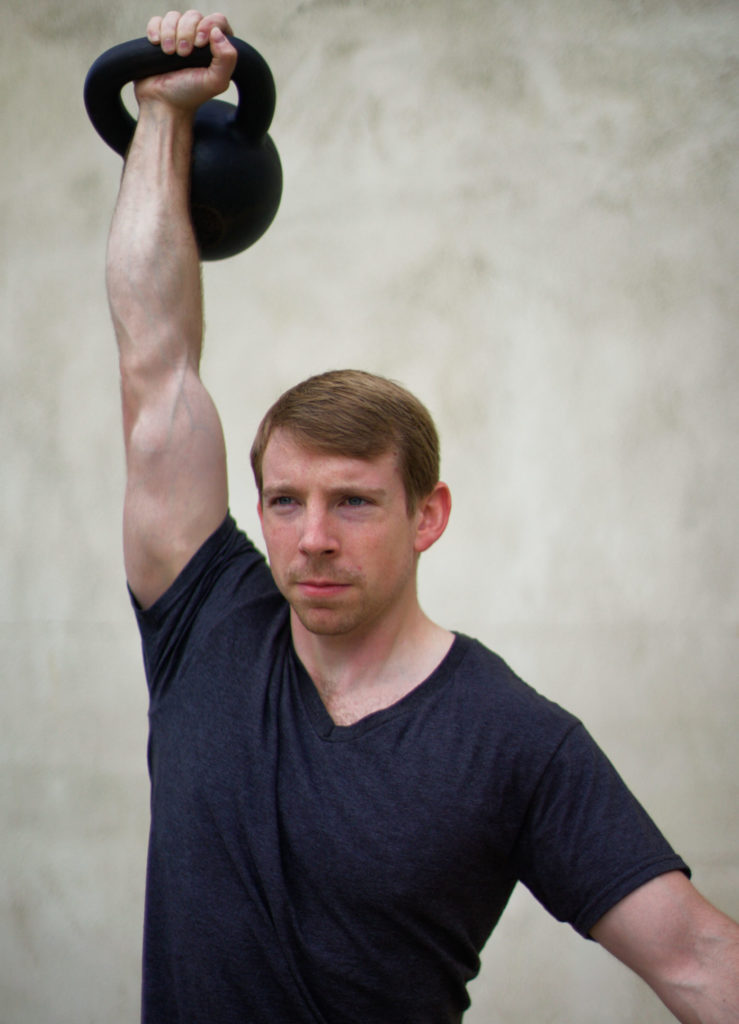
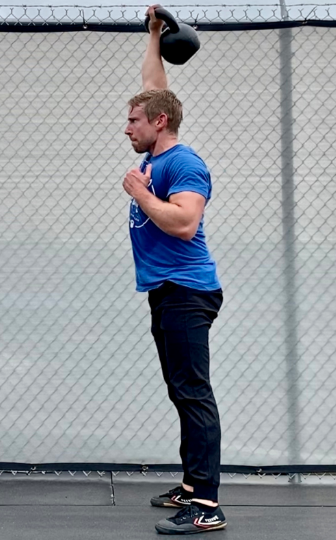
6) Lockout
With only a few inches to go, the bell is already resting safely on the back of the arm and you’re riding the last little bit of upward momentum.
Now’s the time to stick your landing.
Here’s how:
PUNCH!
Absorb the weight of the kettlebell by stiffening the triceps, shoulder girdle, and lats. Punch the sky but keep the shoulder locked down tight. With adequate mobility, you’ll end up with your biceps right by your ear.
Pause and make sure everything feels stacked and engaged.
One caveat:
Yes, the cue is “punch,” but that doesn’t mean you need to make a tight fist. Assuming you got step 5 right, the bell is in a secured position independent of the fingers.
In fact, you can even lockout with a wide open hand to reinforce the deep palm position and to focus on the alignment and engagement of the rest of the body.
7) Tip
Here’s another tricky step to coach because it happens so fast and, really, there’s not much to it.
We’re simply doing the reverse of step 5 – allowing the kettlebell to fall as we switch the grip orientation from the base of the palm back to the fingers.
Start the descent by tipping the wrist forwards and unlocking the elbow.
Release any urge to over-grip the kettlebell. We want it in a free fall.
8) Descent
Again, we are matching and reversing step 4 and the cues are mostly the same:
Keep the bell close and guide it back towards the midline of the body.
Yes, the kettlebell is in free fall, but we can still control the arc by engaging through the lat and keeping a good bend in the elbow.
Now weightless in the air, move your hand to get your fingers loosely around the handle – how you would grip for a swing. The sooner you get there, the better.
By the time the kettlebell is around bellybutton level, 4 things should begin to happen:
The lat and tricep squeeze into each other
The elbow straightens
The grip tightens around the handle
The breath comes in through the nose
These all set you up for a safe transition into the backswing.
9) Backswing
A near copy of step 2, we catch the kettlebell with the hips like a goose egg in a baseball glove – softly!
Careful not to begin the backswing too early.
Many lifters, panicked by a hunk of iron hurdling towards their privates, move the hips before the arms re-connect to the torso (triceps meet lats). This puts stress on the low back and messes with the rhythm of the snatch.
As the knees bend and hips fold, actively “pull” the kettlebell with your lats deep into the hinge position. This will maximize upper back engagement – a key point for safety and power.
With a belly full of air, feet firmly planted flat, and hamstrings taut like a bow, you now have two options:
Perform another rep (repeat the hip snap) or
Park the kettlebell and end the set
10) Park the kettlebell
With the kettlebell loaded up high in the backswing, simply keep the hips right where they are and hold the inhalation to keep the abs braced.
Allow the kettlebell to swing forward and gently place it where you found it.
We’ve ended right back where we started. DONE!
Let’s wrap up this section with two more quick points on snatch technique.
How should one breathe for the kettlebell snatch?
For maximal power – in through the nose during the backswing and out through the mouth with the hip snap just like the swing).
That said, plenty of kettlebellers overuse the “power exhalation” through the mouth and end up gassing out or losing focus on the actual mechanics of the lift.
Plus, how often do we reallyneed that extra oomph?
For most training reps, I suggest a nasal-only breathing style – inhale with the backswing, exhale with the hip snap, and an extra mini breath cycle at the lockout or descent if needed.
Where should one grip the kettlebell handle during the snatch?
Every cast iron kettlebell will have different dimensions based on weight and coating materials will vary between brands.
Combine those factors with your own hand size, strength, and callus development and we’ve got a big question mark here.
The principal concern for hand placement is how easily you can transition between a swing-grip (handle gripped in the fingers) and a press-grip (handle anchored at the base of the palm) while sparing the calluses.
Experiment with 3 grip placement on the kettlebell handle – thumb side, middle, and pinky side. Each angle will give the snatch a different feel and one might help you achieve the smoothest lockout.
You can even change your grip orientation mid-set to distribute the wear pattern and prevent blisters.
Assistance Exercises for the Kettlebell Snatch
I’ve taught the snatch to personal training clients, workshop groups, and online students around the world…
I’ve compiled all my best teaching cues in this article and numerous videos…
But no matter how much you “know” about the snatch, you won’t nail it before getting in lots of practice. And how you go about practicing makes all the difference.
The snatch is an unforgiving lift.
Bruised forearms, torn hands, and tweaked shoulders are all but guaranteed if you jump right in to the full snatch, even if your swings and get-ups are dialed in.
The good news is there are a handful of progressions that allow you to practice the various snatch techniques safely and in isolation before committing to full reps.
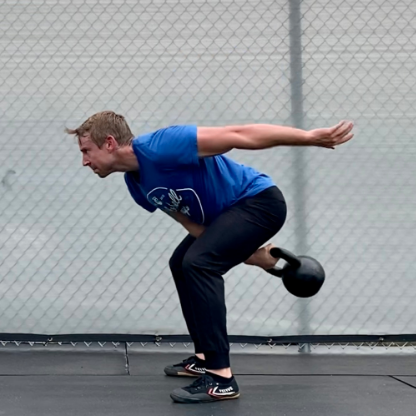
1) High swing
You know the hips power the momentum of the kettlebell.
You also know the arms subtly guide the arc and trajectory of the kettlebell.
The high swing allows you synchronize the hips and arms without fussing over grip changes.
The drill is simple – just swing, keep the bell close to the body (“tame” the arc), allow it to float momentarily overhead, and guide it down in the same arc.
This is basically 80% of the snatch movement, we’re just eliminating the handle pass and lockout.
Focus on the mid-line alignment and how much height you can summon out of a kettlebell while keeping it under control.
2) Snatch up
Click for slow-mo video:
Building off the high swing, now we just add the spear and lockout – steps 1-6.
From the top, slowly bring the kettlebell back to the rack position (as in a military press).
Park the bell or backswing and repeat.
3) Clean Drop
Successfully passing the kettlebell handle from the base of the palm to the fingers without catching the callus line is one of the trickiest maneuvers in kettlebell lifting.
We can train this skill in a low-risk environment by practicing the drop from the rack or clean position.
Simply clean a kettlebell and take a mental note of how the handle feels in the palm. In theory, the bell rests on the arm the same – whether overhead or racked at the shoulder.
Let the bell fall away as you open your hand, re-grip the handle with the fingers in midair, and pull into the backswing – a repeat of steps 7-9 while only traveling half the distance.
https://www.instagram.com/p/B6auaChnpxf/
4) Snatch Drop
Click for slow-mo video:
By now, you’ve ingrained the feeling of a smooth grip pass between palm and fingers.
With the snatch drop or snatch eccentric, you’ll drop the bell from overhead, tame the arc, and catch in the backswing (steps 7-9).
Clean and (push) press the kettlebell to return to the overhead position. You must get comfortable with the snatch up and the snatch drop independently before performing them together.
5) The Clock Snatch
The final assistance drill focuses on the spearing technique.
Remember from step 5, timing is everything for getting the bell to the forearm smoothly.
Many lifters spear through too late, causing the kettlebell to crash land and bruise the forearm, destroying any sense of control or coordination.
This exercise forces you in the opposite direction – spearing through early.
Here’s how:
Your overhead lockout (perfectly vertical) is 12 o’clock.
Your arm straight out (parallel to the ground) is 9 o’clock.
Simply, you will “snatch” to 9, 10, and 11 o’clock before settling on high noon. Obviously, you won’t hold any lockout in the first few positions, but you’ll develop a feel for getting around the handle on-command.
While I recommend training these assistance moves in the sequence laid out above, your strengths and areas for improvement might dictate otherwise.
Experiment!
And always stop to regroup if you hit a couple sloppy reps in a row.
Mentally check in and have a specific intention and goal for every set.
Kettlebell Snatch Workouts
Beginner:
As a beginner, your priority is to get comfortable with the snatch techniques and build the strength needed to handle more weight and training volume.
Try this chain (1 rep of each):
Swing, high swing, snatch, negative to the rack.
2-3 rounds and repeat other side.
Intermediate:
As an intermediate, you can incorporate snatches into strength complexes or train them for endurance and work capacity.
Here’s an example of each:
Clean + Press x 3
Snatch x 5
Squat x 8
3-5 Rounds each side
Every minute on the minute x 10 minutes:
Even minutes – Heavy 2-H swings x 10
Odd minutes – Snatches x 10/10
Advanced:
As an advanced snatcher, you might be inclined to tackle something like the Secret Service Snatch Test (200 reps in 10 minutes) or play around with techniques like the bottoms-up snatch, tactical switch, or double snatch.
If you’ve got a football field and a couple kettlebells handy, try this:
Snatch a heavy weight, hold overhead, and walk 5 yards.
Drop and snatch back up, walk 5 yards.
Repeat to the 50 yard line and switch arms.
Once you reach the end zone, snatch a light kettlebell for 50 total reps.
If you’re insane, do it all again back down the field.
Go forth…
To the unknowing eye, the snatch looks simple… and, with time and practice, it is. The lifter who puts in the work will make the very difficult appear effortless.
And that’s the goal – make all these techniques flow together and, eventually, forget them.
Whew! That was a lot.
Want this article broken down into an easy-to-reference cheat sheet?
Click here to snag your copyand get my best, most wicked kettlebell snatch workouts to burn fat fast and build the endurance and power of a racehorse.