
When it comes to abs, bodybuilders and strength athletes agree…
The hanging leg raise is the king of core work.
A strong core is foundational to a strong body.
The strength you develop through hanging leg raises will improve your performance across all sorts of lifts – from bodyweight calisthenics like pull-ups and push-ups to powerlifts like squats and deadlifts.
The leg raise can be used to hypertrophy (grow) the abdominal muscles to get the six-pack look.
The full hanging leg raise also provides a great dynamic stretch for the posterior chain muscle groups of the hamstrings, hips, and low back.
Hanging Leg Raise Muscles Worked
The hanging leg raise is a classic calisthenic exercise that engages multiple muscle groups – contributing to improved abdominal strength and stability, grip and forearm strength, shoulder and spinal mobility, and overall functional fitness.
Here are the primary muscle groups targeted by the hanging leg raise.
Rectus Abdominis
The rectus abdominis, often referred to as the “six-pack” muscle is prominently activated during hanging leg raises. This muscle runs down the front of the abdomen and is responsible for flexing the spine.
Hip Flexors
The hip flexors, including muscles such as the iliopsoas, are heavily involved in raising the legs.
The HLR requires controlled contraction of the hip flexors to lift the legs towards the torso.
Obliques
Both the external and internal obliques, located on the sides of the abdomen, are engaged to stabilize the pelvis and prevent excessive swinging during leg raises. This helps to enhance lateral core strength and definition.
Transverse Abdominis
The transverse abdominis acts as a deep stabilizing muscle that wraps around the abdomen like a corset. It is activated during hanging leg raises to provide stability to the spine and pelvis.
Lower back (Erector Spinae)
While primarily a core exercise, hanging leg raises also recruit the lower back muscles, specifically the erector spinae, to a certain extent. These muscles work to maintain spinal alignment and prevent hyperextension during the leg lifting movement.
Hip Adductors
The inner thigh muscles, known as hip adductors, are engaged as the legs are lifted and brought together in the midline of the body. This adds an extra dimension to the exercise, involving the inner thighs in the movement.
Forearms (Flexors & Extensors)
The muscles of the forearms are heavily involved in maintaining a firm grip during any hanging exercise. Both the flexor muscles (on the palm side) and extensor muscles (on the back side) work to stabilize the wrists and elbows and support the body’s weight.
Latissimus Dorsi (Lats)
The lats are large muscles on the back that extend from the lower spine to the upper arm. They are involved in HLRs as they help depress the shoulder blades, providing stability in the hanging position.
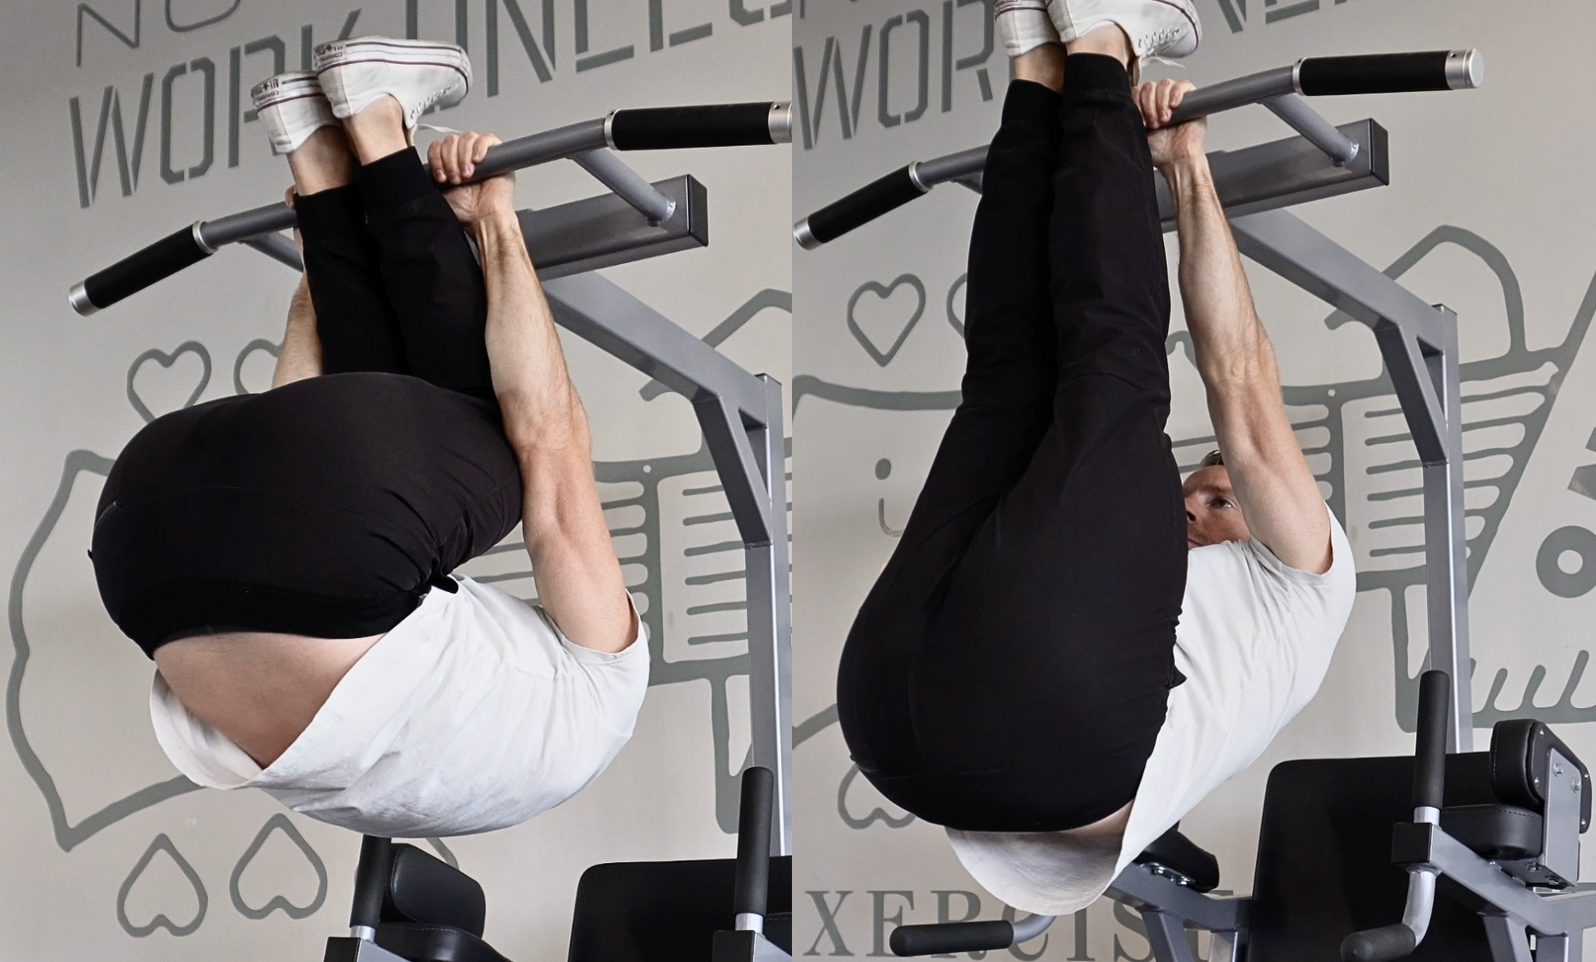
Hanging Leg Raise Proper Form:
Grab a pull-up bar with a shoulder width or slightly narrower grip.
Flex the quads, glutes, abdominals, and lats into a hollow body shape.
Exhale as you fold like a jackknife – pushing your hands forward while driving the legs up.
Allow the low back to round while the abs flex to tilt and raise the pelvis.
Actively push your shins into the bar to maximize the contraction, driving your hands forward isometrically.
Inhale as you lower your legs under control, finishing back in the hollow body shape.
The hanging leg raise should be performed with an emphasis on slow, steady movement. Don’t rush or use momentum.
Keep your glutes and lats tight at the bottom to prevent swinging into the next rep.
Top 7 Hanging Leg Raise Progressions
The strict hanging leg raise is a tough exercise and is a rare sight in most gyms.
It’s an exercise worth doing if you want to truly maximize your total body strength, but don’t expect to pull off a perfect set on your first try.
There are many dozens of leg raise progressions you could do for general core strength…
But I’m going to show you 7 key exercises (in order) that will help you develop the skill and strength for full hanging leg raises.
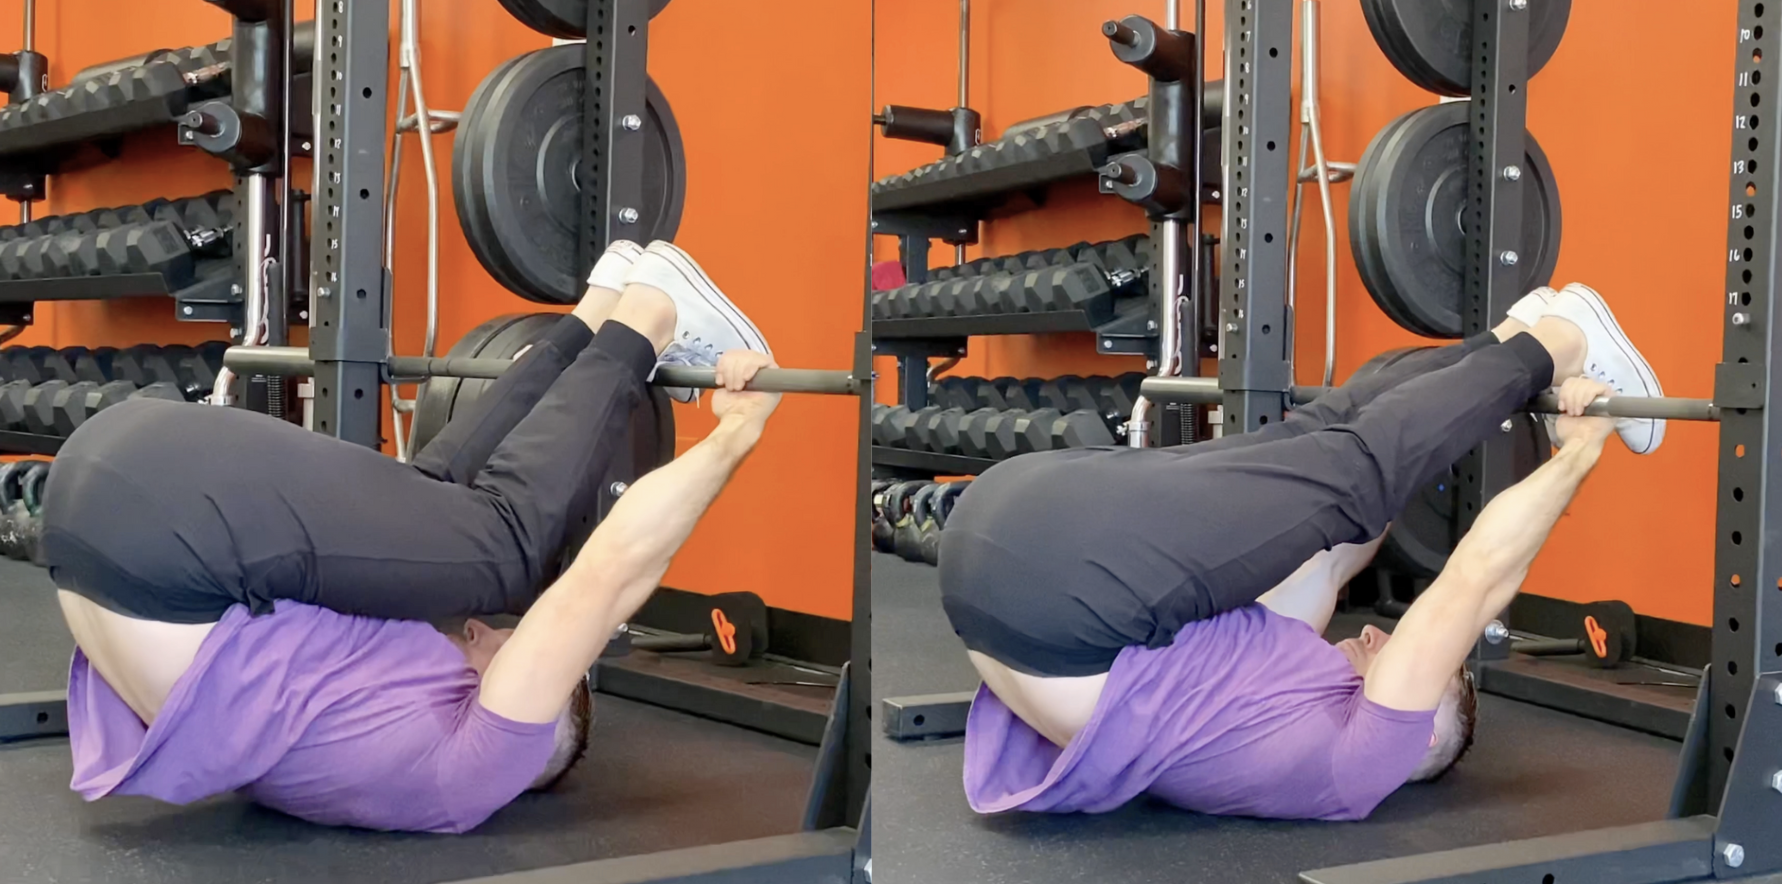
Progression #1) Floor Leg Raise
First, we’ll actually perform the hanging leg raise movement on the floor.
Rack a barbell low so it sits close to the ground.
(You can also use a dowel rod speared between two heavy kettlebells)
Begin by emphasizing the negative (or lowering) part of the rep: Tuck your knees into the chest, roll back, and reach the feet to the bar. Contract your abs hard and slowly lower the legs.
Start by pausing and reversing the movement at 90 degrees, eventually moving all the way out to the full hollow body position.
Progress to the full leg raise pattern and lower the anchor point of the grip to help open the shoulders.
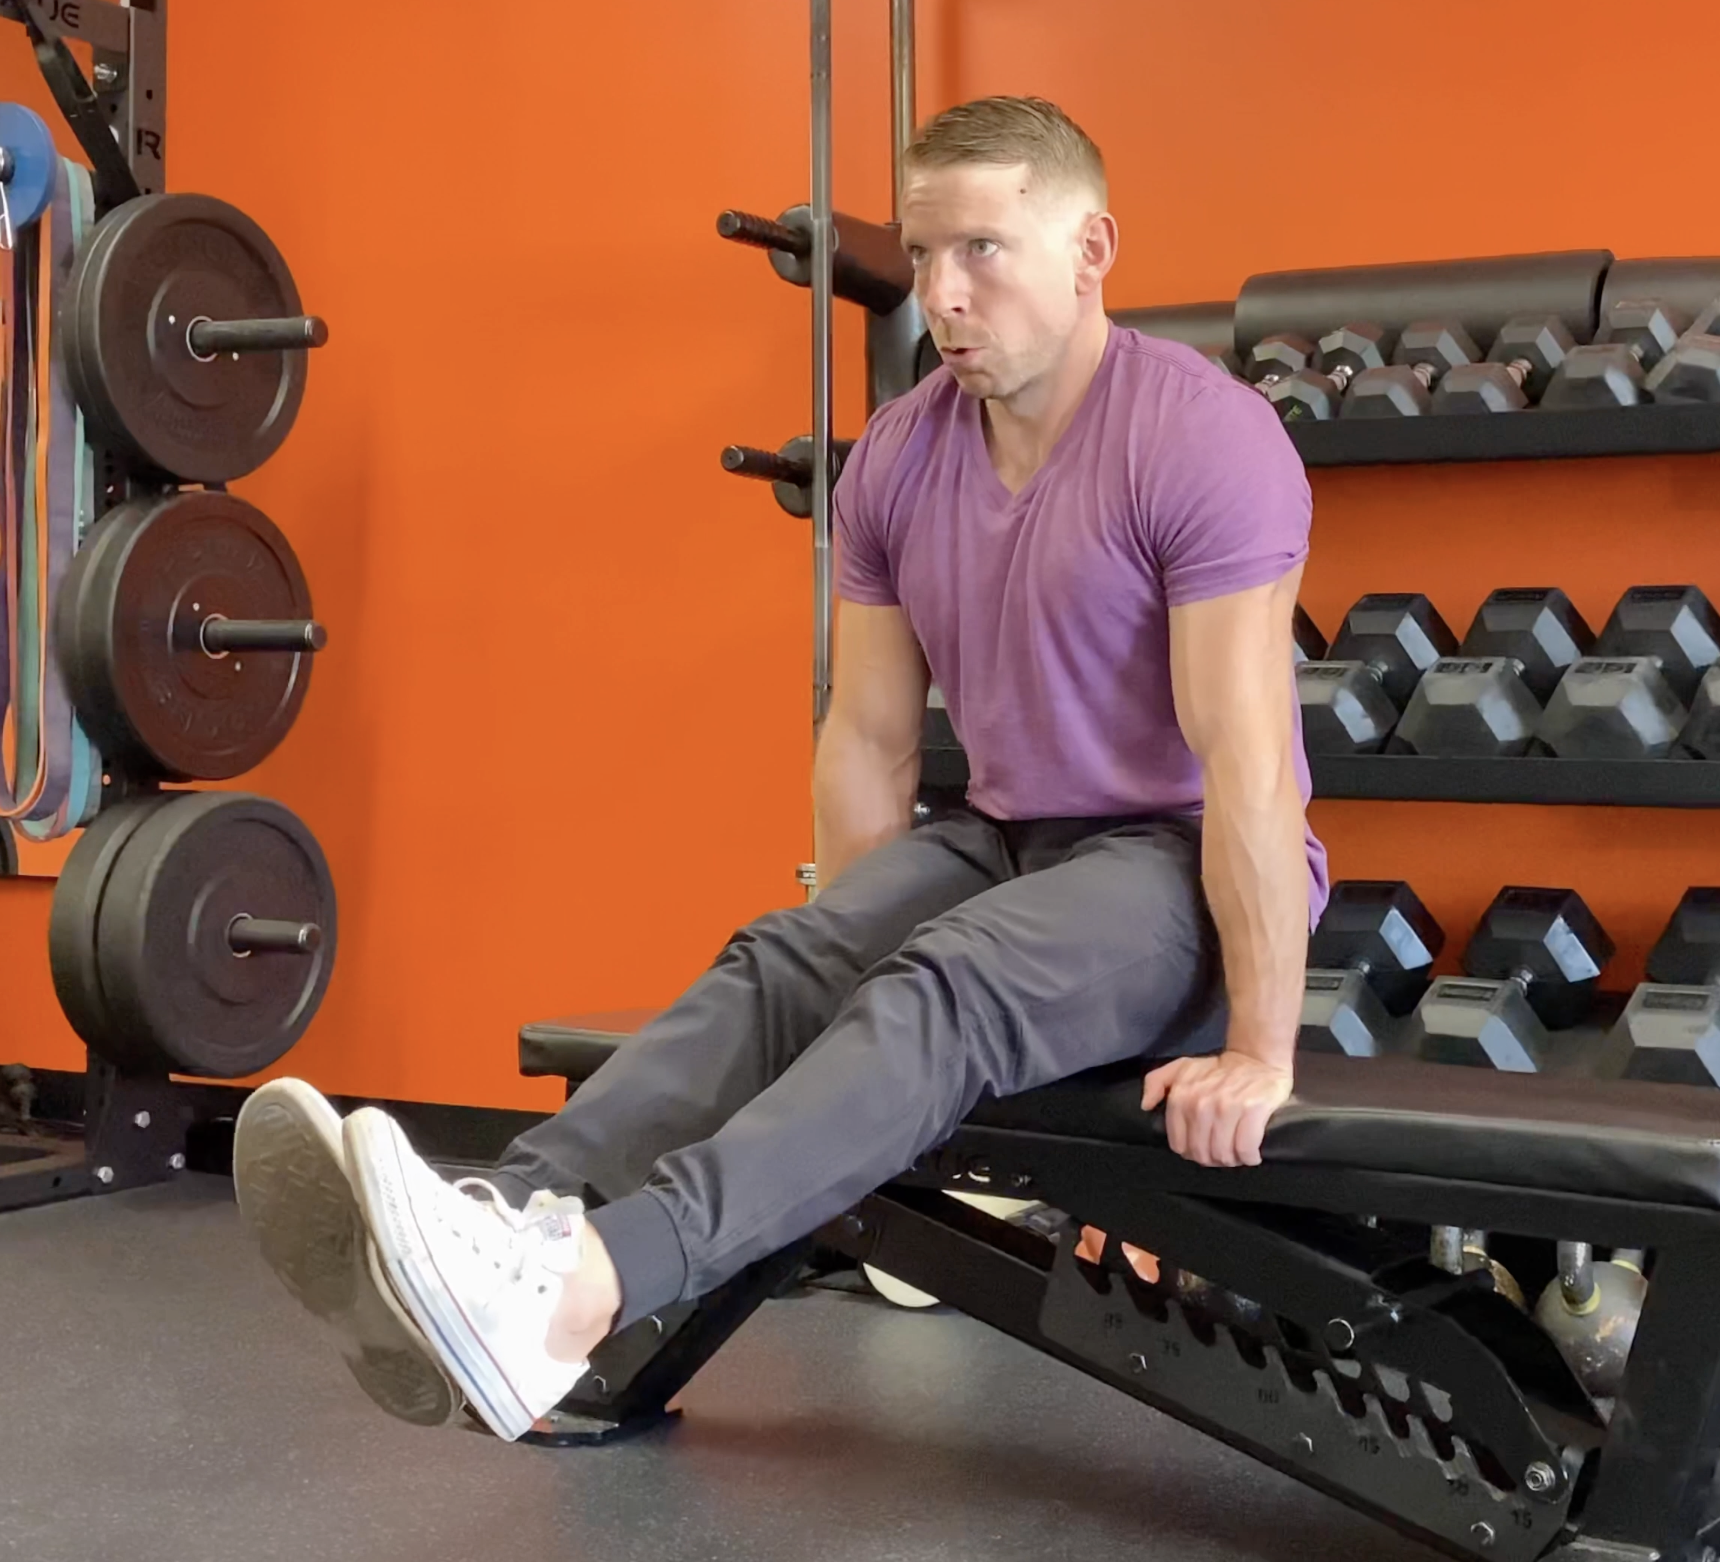
Progression #2) L-Sit Hold
This exercise will develop the strength of your core, deep hip flexors, and triceps.
Sit on a bench or chair and grasp around the edge. Tuck your knees up as you push down with straight arms. Your butt will float off the bench.
Work on extending the legs out into the “L” shape. This is a great exercise for building high-tension core strength without fatiguing the grip.
Progression #3) Hanging Knee Raises
Jump up on a pull-up bar and adopt a hollow body position.
Simply tuck the knees as far up to the chest as you can control.
Move slowly – exhaling with the raise and inhaling as the knees lower.
Remember to keep the lats engaged by pulling the shoulders down away from the ears and pushing the hands forward.

Progression #4) Weighted Knee Raises
For your next progression, we’ll simply add load to the hanging knee raise.
You have a few options for adding weight.
You can grasp a dumbbell or medicine ball between the feet, hang light kettlebells from the toes, or simply wear heavy boots.
This step will solidify your hollow body shape, overload your grip, and strengthen the hip flexors and low abs.

Progression #5) Frog Raises
Now we’ll start incorporating more of the straight-leg shape to add leverage to the abs and work the flexibility of the posterior chain.
The Frog Raise starts as a bent-knee raise.
Pause at the top, straighten the legs out into an “L” shape, and keep them straight all the way down.
You can add micro-progressions here by straightening one leg at a time, or lowering in the middle split position.
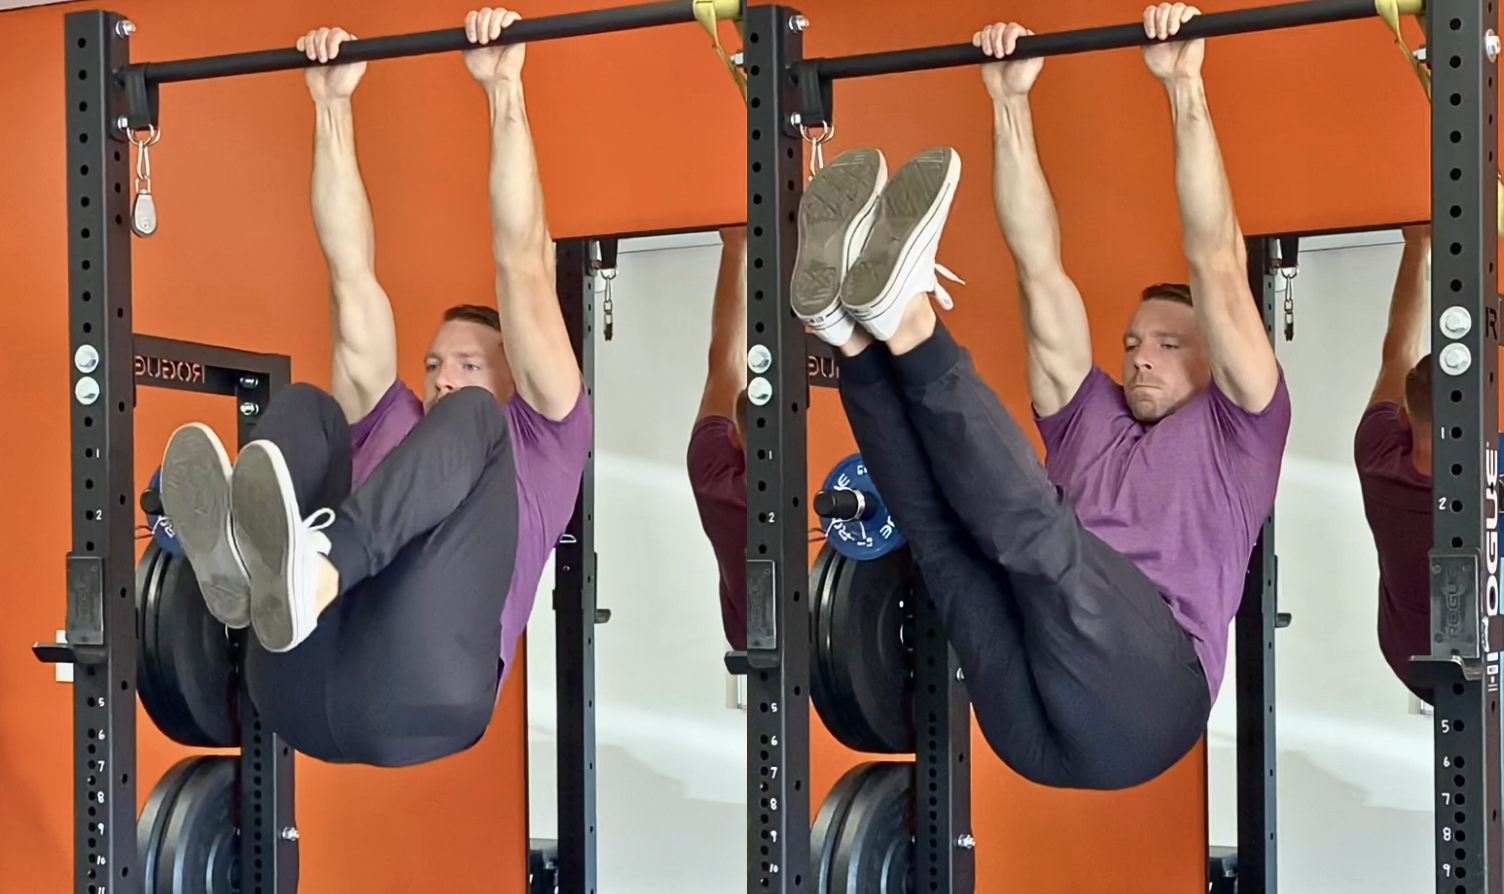
Progression #6) “L” Raises
From a hollow body hang, lock your legs out strong and lift them up until they’re parallel to the floor.
Pause to ensure there is no momentum and slowly lower down.
Bonus: Perform a pull-up at the top of the “L” raise to further strengthen this shape.
Progression #7) Hanging Leg Raise Negatives
The last progression is working the slow negative (lowering portion) of the full hanging leg raise.
Just like we did on the floor, tuck the knees up and reach your shins to the bar.
Pause in this fully contracted position and slowly lower your legs.
Challenge yourself by adding pauses at various ranges of motion to ensure you’re maintaining control.
If you’re feeling limited by your flexibility or core strength, try these with one leg bent at a time.
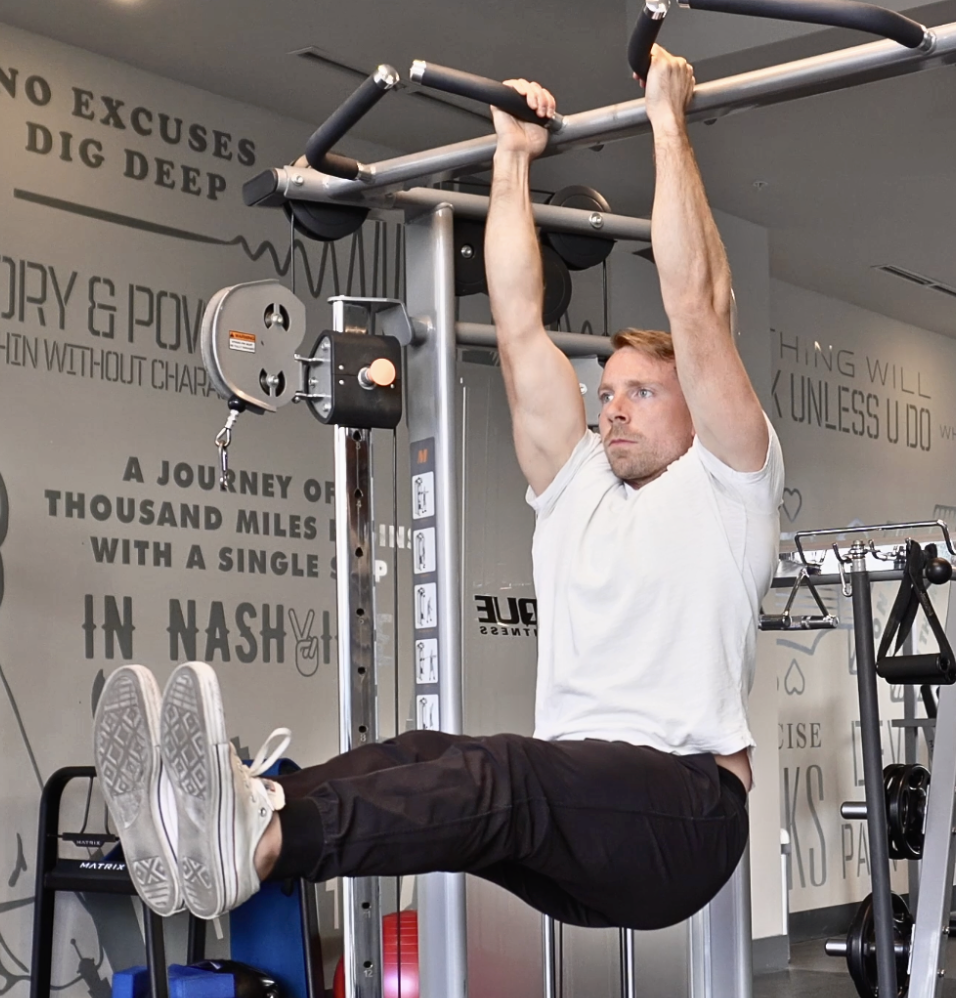
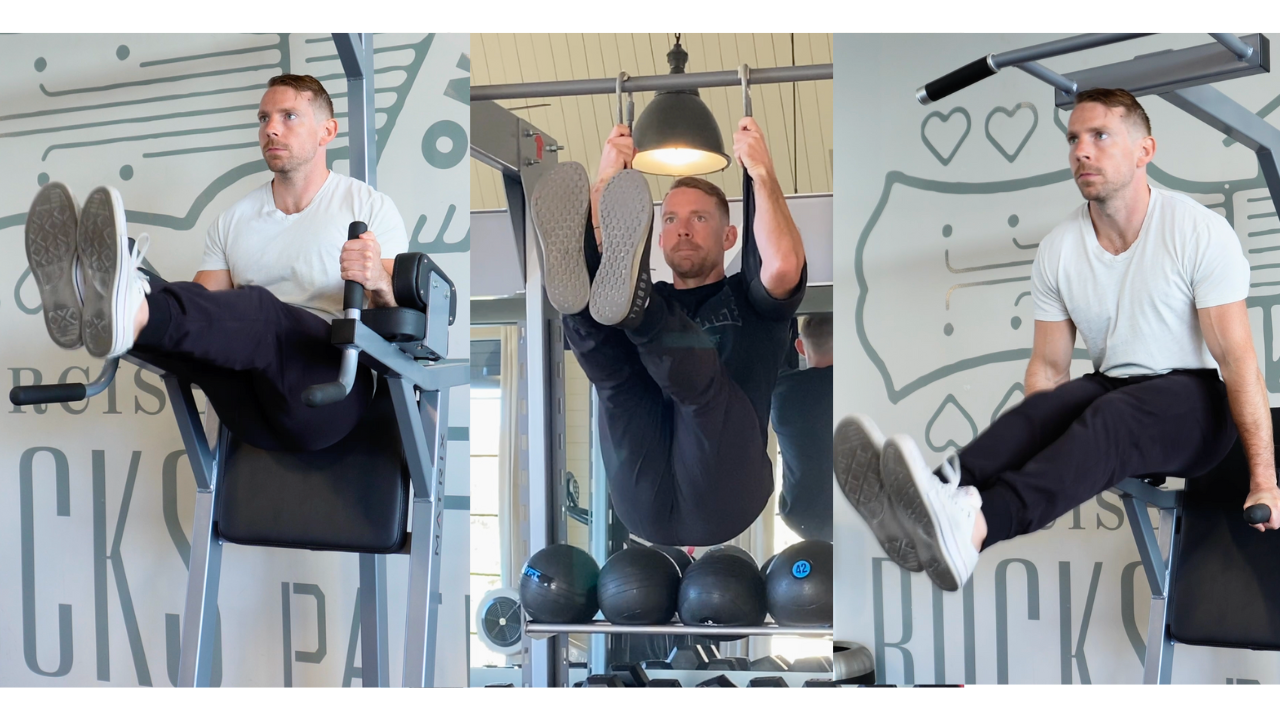
Bonus Variations
I’d be remiss if I didn’t address the fact that hanging leg raises require a tremendous amount of grip strength and shoulder mobility.
While grip strength and shoulder mobility are part of the total package of benefits you get from these exercises, they can also be major limiting factors (especially after fatiguing moves like heavy deadlifts).
You can remove the grip and shoulder considerations almost entirely and still get in some great core work by performing many of these progressions on a captain’s chair, parallel dip bars, or while using arm straps.
Programming the Hanging Leg Raise
Treat the leg raise (and its progressions) like any other strength lift – performing 3 – 8 repetitions for 3 – 5 sets.
Because leg raises tax the grip and core musculature, I recommend performing them after your heaviest lifts in a session.
Once you’ve mastered the hanging leg raise, you can of course push that volume higher… just remember this is a lift that emphasizes controlled tension.
Doing a million reps kind of defeats the training purpose and either means that you need to choose a more challenging progression or you need to tighten up your technique.